自定义CSS
自定义CSS丨放入后台-外观设置-开发者设置-自定义CSS
自定义CSS
/*彩色标签*/
#tag_cloud-2 a,.list-group-item .pull-right {
background-color: #309d9d;
 }
/*彩色标签*/


/*头像旋转*/
.img-circle {
    border-radius: 80%;
    animation: light 5s ease-in-out infinite;
    transition: 0.5s;
}
.img-circle:hover {
    transform: scale(1.55) rotate(720deg);
}
/*头像旋转*/


/*鼠标指针*/
body {
cursor: url(https://sangxuesheng.com/api/a1.cur), default;
}
a:hover{cursor:url(https://sangxuesheng.com/api/a2.cur), pointer;}
/*鼠标指针*/
首页文章版式阴影化
.panel{
   box-shadow: 1px 1px 5px 5px rgba(255, 112, 173, 0.35);
    -moz-box-shadow: 1px 1px 5px 5px rgba(255, 112, 173, 0.35);
}

.panel:hover{
    box-shadow: 1px 1px 5px 5px rgba(255, 112, 173, 0.35);
    -moz-box-shadow: 1px 1px 5px 5px rgba(255, 112, 173, 0.35);
}

.panel-small{
    box-shadow: 1px 1px 5px 5px rgba(255, 112, 173, 0.35);
    -moz-box-shadow: 1px 1px 5px 5px rgba(255, 112, 173, 0.35);
}

.panel-small:hover{
    box-shadow: 1px 1px 5px 5px rgba(255, 112, 173, 0.35);
    -moz-box-shadow: 1px 1px 5px 5px rgba(255, 112, 173, 0.35);
}
首页文章图片获取焦点放大
.item-thumb{
    cursor: pointer;
    transition: all 0.6s;
}

.item-thumb:hover{
      transform: scale(1.05);
}

.item-thumb-small{
    cursor: pointer;
    transition: all 0.6s;
}

.item-thumb-small:hover{
    transform: scale(1.05);
}
标签云整齐排列
/*标签云*/
#tag_cloud-2 a {
border-radius: 5px;
width: 32%;
}
文章内打赏图标跳动
/*文章内打赏图标跳动*/
.btn-pay {
    animation: star 0.5s ease-in-out infinite alternate;
}
@keyframes star {
    from {
        transform: scale(1);
    }
    to {
        transform: scale(1.1);
    }
}
手机适配中不显示热门及标签云
将以下代码添加至后台-开发者设置-自定义CSS。
/*手机不显示*/
@media (max-width:767px) {
    #tabs-4,#tag_cloud-2 {
        display: none;
    }
}
文章标题居中
/*文章标题居中*/
.panel h2{
    text-align: center;
}
.panel-small h2{
    text-align: center;
}
.panel-picture h3{
    text-align: center;
}
.post-item-foot-icon{
    text-align: center;
}
美化主页文章列表宽度
/* 非盒子模式页面宽度 */
.no-container #post-panel, .no-container .blog-posts {
    max-width: 90%;
}
粗体上色
/* 粗体上色 */
strong{
  color: rgb(255, 153, 0);
}
panel阴影
/*panel阴影*/
.panel{
   box-shadow: 1px 1px 5px 5px rgba(255, 112, 173, 0.35);
    -moz-box-shadow: 1px 1px 5px 5px rgba(255, 112, 173, 0.35);
}

.panel:hover{
    box-shadow: 1px 1px 5px 5px rgba(255, 112, 173, 0.35);
    -moz-box-shadow: 1px 1px 5px 5px rgba(255, 112, 173, 0.35);
}

.panel-small{
    box-shadow: 1px 1px 5px 5px rgba(255, 112, 173, 0.35);
    -moz-box-shadow: 1px 1px 5px 5px rgba(255, 112, 173, 0.35);
}

.panel-small:hover{
    box-shadow: 1px 1px 5px 5px rgba(255, 112, 173, 0.35);
    -moz-box-shadow: 1px 1px 5px 5px rgba(255, 112, 173, 0.35);
}
.app.container {
    box-shadow: 0 0 30px rgba(255, 112, 173, 0.35);
}
右侧栏气泡颜色加深
/* 右侧栏气泡颜色加深 */
div.post-tags>a,aside.asideBar .badge{background-color:#777}
时光机圆形头像
/* 时光机圆形头像 */
.img-square {border-radius: 50%;}
.list-group-item .thumb-sm .img-square {border-radius: 5px;}
美化网站右侧滚动条样式
/*定义滚动条高宽及背景 高宽分别对应横竖滚动条的尺寸*/
::-webkit-scrollbar {
    width: 8px;
    height: 6px
}
/*定义滚动条轨道*/
::-webkit-scrollbar-track {
    background-color: transparent;
    -webkit-border-radius: 2em;
    -moz-border-radius: 2em;
    border-radius: 2em
}
/*定义滑块 内阴影+圆角*/
::-webkit-scrollbar-thumb {
    background-color: #30B07F;
    background-image: -webkit-linear-gradient(45deg,rgba(255,255,255,.4) 100%,transparent 100%,transparent 50%,rgba(255,255,255,.4) 50%,rgba(255,255,255,.4) 75%,transparent 75%,transparent);
    -webkit-border-radius: 2em;
    -moz-border-radius: 2em;
    border-radius: 2em
}
标题居中
header.bg-light.lter.wrapper-md {
    text-align: center;
}
博客信息背景色修改
- 文章数量,评论数目等 背景色修改

/*小字体背景色*/
.badge {
    background-color: #ABB6F5;
}
自定义body
自定义body丨放入后台-外观设置-开发者设置-自定义尾部-body
全局彩色字
- 代码
- 使用方法
function colorful(min,max){
var All = document.querySelectorAll('*');
All.forEach(function(item){
 id1 = Math.floor(Math.random()*max)+min;
 id2 = Math.floor(Math.random()*max)+min;
 id3 = Math.floor(Math.random()*max)+min;
 item.style.color = "rgb("+id1+","+id2+","+id3+")";
 item.style.textShadow = "0 0 2px rgb("+id1+","+id2+","+id3+")";
});
}
右键自定义
<style type="text/css">
    a {text-decoration: none;}
    div.usercm{background-repeat:no-repeat;background-position:center center;background-size:cover;background-color:#fff;font-size:13px!important;width:130px;-moz-box-shadow:1px 1px 3px rgba
(0,0,0,.3);box-shadow:0px 0px 15px #333;position:absolute;display:none;z-index:10000;opacity:0.9; border-radius: 8px;}
    div.usercm ul{list-style-type:none;list-style-position:outside;margin:0px;padding:0px;display:block}
    div.usercm ul li{margin:0px;padding:0px;line-height:35px;}
    div.usercm ul li a{color:#666;padding:0 15px;display:block}
    div.usercm ul li a:hover{color:#fff;background:rgba(170,222,18,0.88)}
    div.usercm ul li a i{margin-right:10px}
    a.disabled{color:#c8c8c8!important;cursor:not-allowed}
    a.disabled:hover{background-color:rgba(255,11,11,0)!important}
    div.usercm{background:#fff !important;}
    </style>
<div class="usercm" style="left: 199px; top: 5px; display: none;">
    <ul>
        <li><span class="external-link"><a class="no-external-link" href="https://muyu.love/" target="_blank"><i data-feather="external-link"></i><i class="fa fa-home fa-fw"></i><span>首页</span></a></span></li>
        <li><a href="javascript:void(0);" onclick="getSelect();"><i class="fa fa-copy fa-fw"></i><span>复制</span></a></li>
        <li><a href="javascript:void(0);" onclick="baiduSearch();"><i class="fa fa-search fa-fw"></i><span>搜索</span></a></li>
        <li><a href="javascript:history.go(1);"><i class="fa fa-arrow-right fa-fw"></i><span>前进</span></a></li>
        <li><a href="javascript:history.go(-1);"><i class="fa fa-arrow-left fa-fw"></i><span>后退</span></a></li>
        <li style="border-bottom:1px solid gray"><a href="javascript:window.location.reload();"><i class="fa fa-refresh fa-fw"></i><span>重载网页</span></a></li>
        <li><span class="external-link"><a class="no-external-link" href="https://muyu.love/links.html" target="_blank"><i data-feather="external-link"></i><i class="fa fa-meh-o fa-fw"></i><span>和我当邻居</span></a></span></li>
           <li><span class="external-link"><a class="no-external-link" href="https://muyu.love/message.html" target="_blank"><i data-feather="external-link"></i><i class="fa fa-pencil-square-o fa-fw"></i><span>给我留言吧</span></a></span></li>
    </ul>
</div>
<script type="text/javascript">
    (function(a) {
        a.extend({
            mouseMoveShow: function(b) {
                var d = 0,
                    c = 0,
                    h = 0,
                    k = 0,
                    e = 0,
                    f = 0;
                a(window).mousemove(function(g) {
                    d = a(window).width();
                    c = a(window).height();
                    h = g.clientX;
                    k = g.clientY;
                    e = g.pageX;
                    f = g.pageY;
                    h + a(b).width() >= d && (e = e - a(b).width() - 5);
                    k + a(b).height() >= c && (f = f - a(b).height() - 5);
                    a("html").on({
                        contextmenu: function(c) {
                            3 == c.which && a(b).css({
                                left: e,
                                top: f
                            }).show()
                        },
                        click: function() {
                            a(b).hide()
                        }
                    })
                })
            },
            disabledContextMenu: function() {
                window.oncontextmenu = function() {
                    return !1
                }
            }
        })
    })(jQuery);

    function getSelect() {
        "" == (window.getSelection ? window.getSelection() : document.selection.createRange().text) ? layer.msg("啊噢...你没还没选择文字呢!") : document.execCommand("Copy")
    }
    function baiduSearch() {
        var a = window.getSelection ? window.getSelection() : document.selection.createRange().text;
        "" == a ? layer.msg("啊噢...你没还没选择文字呢!") : window.open("https://www.baidu.com/s?wd=" + a)
    }
    $(function() {
        for (var a = navigator.userAgent, b = "Android;iPhone;SymbianOS;Windows Phone;iPad;iPod".split(";"), d = !0, c = 0; c < b.length; c++) if (0 < a.indexOf(b[c])) {
            d = !1;
            break
        }
        d && ($.mouseMoveShow(".usercm"), $.disabledContextMenu())
    });
    </script>
万能的控制台
<!--输出控制台-->
<script type="text/javascript">
  console.clear();  //清空控制台
  console.log("\n %c Catalpa Blog  控制台--没什么可看的","color:#fff;background: linear-gradient(to right , #7A88FF, #d27aff);padding:5px;border-radius: 10px;");  //万能控制台,可写html代码
</script>
博客背景添加冒泡动画
设置
id: '',                           //容器ID
    num: 100,                        // 个数
    start_probability: 0.1,          // 如果数量小于num,有这些几率添加一个新的
    radius_min: 1,                   // 初始半径最小值
    radius_max: 2,                   // 初始半径最大值
    radius_add_min: .3,               // 半径增加最小值
    radius_add_max: .5,               // 半径增加最大值
    opacity_min: 0.3,                 // 初始透明度最小值
    opacity_max: 0.5,                // 初始透明度最大值
    opacity_prev_min: .003,            // 透明度递减值最小值
    opacity_prev_max: .005,            // 透明度递减值最大值
    light_min: 40,                 // 颜色亮度最小值
    light_max: 70,                 // 颜色亮度最大值
    is_same_color: false,          //泡泡颜色是否相同
    background:"#f1f3f4"           //背景颜色
复制这段内容并添加在前面,handsome主题可以在 开发者设置 自定义输出body 尾部的HTML代码中添加。
<div id="bubble"></div><script>class BGBubble{constructor(i){this.defaultOpts={id:"",num:100,start_probability:.1,radius_min:1,radius_max:2,radius_add_min:.3,radius_add_max:.5,opacity_min:.3,opacity_max:.5,opacity_prev_min:.003,opacity_prev_max:.005,light_min:40,light_max:70,is_same_color:!1,background:"#f1f3f4"},"[object Object]"==Object.prototype.toString.call(i)?this.userOpts={...this.defaultOpts,...i}:this.userOpts={...this.defaultOpts,id:i},this.color=this.random(0,360),this.bubbleNum=[],this.requestAnimationFrame=window.requestAnimationFrame||window.mozRequestAnimationFrame||window.webkitRequestAnimationFrame||window.msRequestAnimationFrame,this.cancelAnimationFrame=window.cancelAnimationFrame||window.mozCancelAnimationFrame}random(i,t){return Math.random()*(t-i)+i}initBubble(i,t){const a=window.innerWidth,s=window.innerHeight,n=this.userOpts,e=this.random(n.light_min,n.light_max);this.bubble={x:this.random(0,a),y:this.random(0,s),radius:this.random(n.radius_min,n.radius_max),radiusChange:this.random(n.radius_add_min,n.radius_add_max),opacity:this.random(n.opacity_min,n.opacity_max),opacityChange:this.random(n.opacity_prev_min,n.opacity_prev_max),light:e,color:`hsl(${t?i:this.random(0,360)},100%,${e}%)`}}bubbling(i,t,a){!this.bubble&&this.initBubble(t,a);const s=this.bubble;i.fillStyle=s.color,i.globalAlpha=s.opacity,i.beginPath(),i.arc(s.x,s.y,s.radius,0,2*Math.PI,!0),i.closePath(),i.fill(),i.globalAlpha=1,s.opacity-=s.opacityChange,s.radius+=s.radiusChange,s.opacity<=0&&this.initBubble(t,a)}createCanvas(){this.canvas=document.createElement("canvas"),this.ctx=this.canvas.getContext("2d"),this.canvas.style.display="block",this.canvas.width=window.innerWidth,this.canvas.height=window.innerHeight,this.canvas.style.position="fixed",this.canvas.style.top="0",this.canvas.style.left="0",this.canvas.style.zIndex="-1",document.getElementById(this.userOpts.id).appendChild(this.canvas),window.onresize=(()=>{this.canvas.width=window.innerWidth,this.canvas.height=window.innerHeight})}start(){const i=window.innerWidth,t=window.innerHeight;this.color+=.1,this.ctx.fillStyle=this.defaultOpts.background,this.ctx.fillRect(0,0,i,t),this.bubbleNum.length<this.userOpts.num&&Math.random()<this.userOpts.start_probability&&this.bubbleNum.push(new BGBubble),this.bubbleNum.forEach(i=>i.bubbling(this.ctx,this.color,this.userOpts.is_same_color));const a=this.requestAnimationFrame;this.myReq=a(()=>this.start())}destory(){(0,this.cancelAnimationFrame)(this.myReq),window.onresize=null}}const bubbleDemo=new BGBubble("bubble");bubbleDemo.createCanvas(),bubbleDemo.start();</script>防调试
禁止右键-禁止F12-打开开发者工具自动跳转
(QQ游览器,火狐不支持跳转~!)
复制这段内容并添加在前面,handsome主题可以在 开发者设置 自定义输出body 尾部的HTML代码中添加。
<!--防调试--> <script type="text/javascript"> $(document).ready(function () { document.oncontextmenu = function () { return false; } //document.onselectstart = function () { // return false; // } //document.oncopy = function () { //return false; // } document.onkeydown = function () { //f12 if (window.event && window.event.keyCode == 123) { event.keyCode = 0; event.returnValue = false; layer.msg("别看代码了=.=") return false; } //ctrl+u if (event.ctrlKey && window.event.keyCode == 85) { return false; } //ctrl+shift+i if ((event.ctrlKey) && (event.shiftKey) && (event.keyCode == 73)) { return false; } // Ctrl+S else if ((event.ctrlKey) && (event.keyCode == 83)) { return false; } }; }); </script> <!--<script> // 反调试函数,参数:开关,执行代码 function endebug(off, code) { if (!off) { ! function(e) { function n(e) { function n() { return u; } function o() { window.Firebug && window.Firebug.chrome && window.Firebug.chrome.isInitialized ? t("on") : (a = "off", console.log(d), console.clear(), t(a)); } function t(e) { u !== e && (u = e, "function" == typeof c.onchange && c.onchange(e)); } function r() { l || (l = !0, window.removeEventListener("resize", o), clearInterval(f)); } "function" == typeof e && (e = { onchange: e }); var i = (e = e || {}).delay || 500, c = {}; c.onchange = e.onchange; var a, d = new Image; d.__defineGetter__("id", function() { a = "on" }); var u = "unknown"; c.getStatus = n; var f = setInterval(o, i); window.addEventListener("resize", o); var l; return c.free = r, c; } var o = o || {}; o.create = n, "function" == typeof define ? (define.amd || define.cmd) && define(function() { return o }) : "undefined" != typeof module && module.exports ? module.exports = o : window.jdetects = o }(), jdetects.create(function(e) { var a = 0; var n = setInterval(function() { if ("on" == e) { setTimeout(function() { if (a == 0) { a = 1; setTimeout(code); } }, 200); } }, 100); }) } } endebug(false, function() { // 非法调试执行的代码(不要使用控制台输出的提醒) document.write("检测到非法调试,请关闭后刷新重试!"); }); </script>--> <script> //debug调试时跳转页面 var element = new Image(); Object.defineProperty(element,'id',{get:function(){window.location.href="https://muyu.love"}}); console.log(element); </script>
五颜六色字体
<script>
/*五颜六色字体*/
function sjcolor(){
    var colorArr = ["#428BCA", "#AEDCAE", "#ECA9A7", "#DA99FF", "#FFB380", "#D9B999", "#3bca6e", "#f23232", "#834e75", "#23b7e5", "#f60"];
    /*设置颜色*/
    document.querySelectorAll("#aside > div > div.navi-wrap.scroll-y.scroll-hide > nav > ul > li > a > span").forEach(e => {
        e.style.color = colorArr[Math.floor(Math.random() * colorArr.length)];
    });
    document.querySelectorAll("#aside > div > div.navi-wrap.scroll-y.scroll-hide > nav > ul > li > ul > li > a > span").forEach(e => {
        e.style.color = colorArr[Math.floor(Math.random() * colorArr.length)];
    });
    document.querySelectorAll("#aside > div > div.navi-wrap.scroll-y.scroll-hide > nav > ul > li > ul > li > a").forEach(e => {
        e.style.color = colorArr[Math.floor(Math.random() * colorArr.length)];
    });
    document.querySelectorAll("#aside > div > div.navi-wrap.scroll-y.scroll-hide > nav > ul > li > ul > li > a > b").forEach(e => {
        e.style.backgroundColor = colorArr[Math.floor(Math.random() * colorArr.length)];
    });
    /*左侧导航字体颜色*/
    document.querySelectorAll("#post-panel > div > div > div > div.panel-body > div.nav-tabs-alt > ul > li > a").forEach(e => {
        e.style.color = colorArr[Math.floor(Math.random() * colorArr.length)];
    });
    document.querySelectorAll("#post-panel > div > div > div > div").forEach(e => {
        e.style.color = colorArr[Math.floor(Math.random() * colorArr.length)];
    });
    document.querySelectorAll("#post-panel > div.blog-post > div > div.post-meta.wrapper-lg > h2 > a").forEach(e => {
        e.style.color = colorArr[Math.floor(Math.random() * colorArr.length)];
    });
    /*首页面板*/
    document.querySelectorAll("#small_widgets > h1").forEach(e => {
        e.style.color = colorArr[Math.floor(Math.random() * colorArr.length)];
    });
    document.querySelectorAll("#small_widgets > ul").forEach(e => {
        e.style.color = colorArr[Math.floor(Math.random() * colorArr.length)];
    });
    document.querySelectorAll("#content > main > div > div > div > h1").forEach(e => {
        e.style.color = colorArr[Math.floor(Math.random() * colorArr.length)];
    });
    /*博客名称*/
    document.querySelectorAll(".m-l-xs").forEach(e => {
        e.style.color = colorArr[Math.floor(Math.random() * colorArr.length)];
    });
    /*文章标题*/
    document.querySelectorAll("#search_input").forEach(e => {
        e.style.color = colorArr[Math.floor(Math.random() * colorArr.length)];
    });
    /*搜索框*/
    document.querySelectorAll("#content > main > div > div > h1").forEach(e => {
        e.style.color = colorArr[Math.floor(Math.random() * colorArr.length)];
    });
    document.querySelectorAll("#content > main > div > div > div > div a >span").forEach(e => {
        e.style.color = colorArr[Math.floor(Math.random() * colorArr.length)];
    });
    /*友情链接*/
    document.querySelectorAll("#header > div > ul > li > div > div > div > div > div > div > a > span > span").forEach(e => {
        e.style.color = colorArr[Math.floor(Math.random() * colorArr.length)];
    });
    /*工具导航*/
    document.querySelectorAll("#tag_toc > h5").forEach(e => {
        e.style.color = colorArr[Math.floor(Math.random() * colorArr.length)];
    });
    /*文章目录*/
    document.querySelectorAll("#content > main > div > div > header > h1").forEach(e => {
        e.style.color = colorArr[Math.floor(Math.random() * colorArr.length)];
    });
    document.querySelectorAll("#typedWord").forEach(e => {
        e.style.color = colorArr[Math.floor(Math.random() * colorArr.length)];
    });
    /*签名标题*/
    document.querySelectorAll("#tag_cloud-2 h5").forEach(e => {
        e.style.color = colorArr[Math.floor(Math.random() * colorArr.length)];
    });
    document.querySelectorAll("#tag_cloud-2 a").forEach(e => {
        e.style.backgroundColor = colorArr[Math.floor(Math.random() * colorArr.length)];
    });
    /*标签颜色*/
    document.querySelectorAll("#blog_info > ul > li > span.badge.pull-right").forEach(e => {
        e.style.backgroundColor = colorArr[Math.floor(Math.random() * colorArr.length)];
    });
    /*博客信息*/
    document.querySelectorAll("#blog_info > h5").forEach(e => {
        e.style.color = colorArr[Math.floor(Math.random() * colorArr.length)];
    });
    document.querySelectorAll("#widget-tabs-4-hots > h5").forEach(e => {
        e.style.color = colorArr[Math.floor(Math.random() * colorArr.length)];
    });
    document.querySelectorAll("#widget-tabs-4-hots > ul > li > div > h4 > a").forEach(e => {
        e.style.color = colorArr[Math.floor(Math.random() * colorArr.length)];
    });
    document.querySelectorAll("#widget-tabs-4-hots > ul > li > div > small > span > span.meta-value").forEach(e => {
        e.style.color = colorArr[Math.floor(Math.random() * colorArr.length)];
    });
    /*热门文章颜色*/
    document.querySelectorAll("#widget-tabs-4-comments > h5").forEach(e => {
        e.style.color = colorArr[Math.floor(Math.random() * colorArr.length)];
    });
    document.querySelectorAll("#widget-tabs-4-comments > ul > li > div > div > a").forEach(e => {
        e.style.color = colorArr[Math.floor(Math.random() * colorArr.length)];
    });
    document.querySelectorAll("#widget-tabs-4-comments > ul > li > div > small > span").forEach(e => {
        e.style.color = colorArr[Math.floor(Math.random() * colorArr.length)];
    });
    /*最新评论颜色*/
    document.querySelectorAll("#widget-tabs-4-random > h5").forEach(e => {
        e.style.color = colorArr[Math.floor(Math.random() * colorArr.length)];
    });
    document.querySelectorAll("#widget-tabs-4-random > ul > li > div > h4 > a").forEach(e => {
        e.style.color = colorArr[Math.floor(Math.random() * colorArr.length)];
    });
    document.querySelectorAll("#widget-tabs-4-random > ul > li > div > small > span > span.meta-value").forEach(e => {
        e.style.color = colorArr[Math.floor(Math.random() * colorArr.length)];
    });
    /*随机文章颜色*/
    document.querySelectorAll("#sidebar > section.widget.widget_categories.wrapper-md.clear.visible-lg.visible-md > h5").forEach(e => {
        e.style.color = colorArr[Math.floor(Math.random() * colorArr.length)];
    });
    /*手机阅读标题*/
}sjcolor();
</script>
Pjax:后台主题设置回调函数内添加
<!--五颜六色字体-->
sjcolor();
自定义JavaScript
自定义JavaScript丨放入后台-外观设置-开发者设置-自定义JavaScript
彩色标签云
<br></div><!--左侧图标颜色and彩色标签云-->
let tags = document.querySelectorAll("#tag_cloud-2 a");
let infos = document.querySelectorAll(".badge");
let colorArr = ["#428BCA", "#AEDCAE", "#ECA9A7", "#DA99FF", "#FFB380", "#D9B999"];
tags.forEach(tag => {
    tagsColor = colorArr[Math.floor(Math.random() * colorArr.length)];
    tag.style.backgroundColor = tagsColor;
});
infos.forEach(info => {
    infosColor = colorArr[Math.floor(Math.random() * colorArr.length)];
    info.style.backgroundColor = infosColor;
});
function addNumber(a) {
    var length = document.getElementById("comment").value.length;
    if(length> 0){
        document.getElementById("comment").focus()
        document.getElementById("comment").value += '\n' + a + new Date
    }else{
        document.getElementById("comment").focus()
        document.getElementById("comment").value += a + new Date
    }
}
let leftHeader = document.querySelectorAll("span.nav-icon>svg,span.nav-icon>i");
let leftHeaderColorArr = ["#FF69B4", "#58c7ea", "#E066FF", "#FF69B4", "#FFA54F", "#90EE90"];
leftHeader.forEach(tag => {
    tagsColor = leftHeaderColorArr[Math.floor(Math.random() * colorArr.length)];
    tag.style.color = tagsColor;
});如果你的主题开启了pjax,需在后台pjax添加回调函数>pjax添加回调函数
let tags = document.querySelectorAll("#tag_cloud-2 a");
let infos = document.querySelectorAll(".badge");
let colorArr = ["#428BCA", "#AEDCAE", "#ECA9A7", "#DA99FF", "#FFB380", "#D9B999"];
tags.forEach(tag => {
    tagsColor = colorArr[Math.floor(Math.random() * colorArr.length)];
    tag.style.backgroundColor = tagsColor;
});
infos.forEach(info => {
    infosColor = colorArr[Math.floor(Math.random() * colorArr.length)];
    info.style.backgroundColor = infosColor;
});
function addNumber(a) {
    var length = document.getElementById("comment").value.length;
    if(length> 0){
        document.getElementById("comment").focus()
        document.getElementById("comment").value += '\n' + a + new Date
    }else{
        document.getElementById("comment").focus()
        document.getElementById("comment").value += a + new Date
    }
}
播放器音乐大小
博客开启了自动播放的哥哥们必备
<!--音乐音量--><!--volume=0.5,数值越小音量越小-->
setTimeout(function (){    document.querySelector(".skPlayer-source").volume=0.5;}, 3000);
动态标题栏
<!--图片链接可替换-->
var OriginTitle = document.title;
var titleTime;
document.addEventListener('visibilitychange', function () {
     if (document.hidden) {
         $('[rel="icon"]').attr('href', "https://cdn.jsdelivr.net/gh/Catalpablog/handsome/img/warning.webp");
         document.title = '网页崩溃了!!!';
         clearTimeout(titleTime);
     }
     else {
         $('[rel="icon"]').attr('href', "https://cdn.jsdelivr.net/gh/Catalpablog/handsome/img/favicon.webp");
         document.title = '咦,又好啦(✿◡‿◡)' ;
         titleTime = setTimeout(function () {
             document.title = OriginTitle;
         }, 2000);
     }
 });
左侧彩色图标
- 自定义
JavaScript和pjax回调添加下面代码 - ARGB可以修改成自己喜欢的颜色,网上好多都是彩色的,不好看也不好搭配,所以博主修改了自己喜欢的颜色?

<!--左侧彩色图标-->
  let leftHeader=document.querySelectorAll("span.nav-icon>svg,span.nav-icon>i");let leftHeaderColorArr=["#7887EB","#ABDEF3", "#6CC3E8", "#86DEF3", "#7887EB", "#9BA8F5","#7988EC","#B3BCF5","#ABDEF3","#B3BCD7","#91D7F3","#7988EC","#9CD2E9","#9BA8F5","#B3BCF5"];leftHeader.forEach(tag=>{tagsColor=leftHeaderColorArr[Math.floor(Math.random()*leftHeaderColorArr.length)];tag.style.color=tagsColor});
右侧彩色图标
- 自定义
JavaScript和pjax回调添加下面代码 - ARGB可以修改成自己喜欢的颜色,网上好多都是彩色的,不好看也不好搭配,所以博主修改了自己喜欢的颜色?
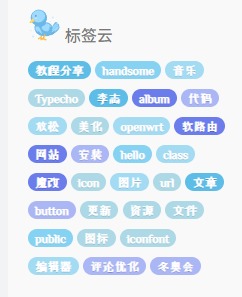
 <!--淡蓝标签云-->
let tags = document.querySelectorAll("#tag_cloud-2 a"); let colorArr = ["#ABB6F5", "#6B7CEB", "#86D2F3", "#5DBDE7", "#A3DBF3", "#ADD8E6"]; tags.forEach(tag => {     tagsColor = colorArr[Math.floor(Math.random() * colorArr.length)];     tag.style.backgroundColor = tagsColor; });
左上角加上FPS
自定义
JavaScript和pjax回调添加下面代码$('body').before('<div id="fps" style="z-index:10000;position:fixed;top:3;left:3;font-weight:bold;"></div>'); var showFPS = (function(){ var requestAnimationFrame = window.requestAnimationFrame || window.webkitRequestAnimationFrame || window.mozRequestAnimationFrame || window.oRequestAnimationFrame || window.msRequestAnimationFrame || function(callback) { window.setTimeout(callback, 1000/60); }; var e,pe,pid,fps,last,offset,step,appendFps; fps = 0; last = Date.now(); step = function(){ offset = Date.now() - last; fps += 1; if( offset >= 1000 ){ last += offset; appendFps(fps); fps = 0; } requestAnimationFrame( step ); }; appendFps = function(fps){ console.log(fps+'FPS'); $('#fps').html(fps+'FPS'); }; step(); })();
其他修改
这个的话就是一般都是改源代码的了
顶部图标修改

路径:handsome/component/sidebar
- 1.1 找到这个
div删掉
<div class="sidebar-icon wrapper-sm"><i data-feather="thumbs-up"></i></div>- 1.2 替换成
img标签,有三个,依次替换即可
< img src="https://youpaiyun.sangxuesheng.cn/Blog/assets/img/sj2/15.svg" style="height: 2.5em;" >- 1.3 效果预览

- 1.4 修改参考:
   <li data-index="0" class="active" role="presentation"> <a data-target="#widget-tabs-4-hots" role="tab"
                                                                   aria-controls="widget-tabs-4-hots" aria-expanded="true" data-toggle="tab"><img src="https://sangxuesheng.com/api/api2" style="height: 2.5em;"><span class="sr-only"><?php _me("热门文章") ?></span> </a></li>
            <?php if (COMMENT_SYSTEM == 0): ?>
                <li role="presentation" data-index="1"> <a data-target="#widget-tabs-4-comments" role="tab" aria-controls="widget-tabs-4-comments" aria-expanded="false" data-toggle="tab"><img src="https://sangxuesheng.com/api/api3" style="height: 2.5em;"><span class="sr-only"><?php _me("最新评论") ?></span> </a></li>
            <?php endif; ?>
            <li data-index="2" role="presentation"> <a data-target="#widget-tabs-4-random" role="tab" aria-controls="widget-tabs-4-random" aria-expanded="false" data-toggle="tab"> <img src="https://sangxuesheng.com/api/api4" style="height: 2.5em;"> <span class="sr-only"><?php _me("随机文章") ?></span>
             </a></li>
侧边栏缩略图

路径:handsome/functions_mine
- 2.1 找到这行代码,并把
jpg,修改为svg
$random = STATIC_PATH . 'img/sj2/' . $randomNum[$index] . '.svg';路径:handsome/assets/img/sj2
- 2.3 选择一套你喜欢的
SVG图,替换原来路径文件夹内的图片,注意名称不要换掉咯 - 2.4 效果预览

顶部导航增加网盘

路径:/usr/themes/handsome/component/headnav.php
1.1在闲言碎语上面插入下面代码即可
1.2注意地址需要换成自己的,图标也可以更换
 <!--网盘-->
<li class="dropdown">
<a target="_self" href="http://wangpan.sangxuesheng.com/" class="dropdown-toggle"><i class="fa fa-cloud-download icon-fw"></i><span class="visible-xs-inline">Cloud</span></a>
头像与广告位
- 7.1 头像调用
SVG图接口随机(初级设置 → 头像图片地址 )
https://sangxuesheng.com/api- 7.2 广告位置调用
SVG插画随机内容(开发者设置 → 全局右侧边栏广告位)
<img src="https://sangxuesheng.com/api">效果:
底部信息修改
- 左侧信息修改,在这个网站去生成需要的样式
Shields.io,然后(开发者设置 → 博客底部左侧信息 )
< img src="https://youpaiyun.sangxuesheng.cn/Blog/assets/img/sj2/15.svg" > | < img src="https://youpaiyun.sangxuesheng.cn/Blog/assets/img/sj2/15.svg" >路径:handsome/component/footer
- 右侧信息修改,先删除原来的信息内容,大概
121行 , 然后(开发者设置 → 博客底部右侧信息 )想写什么写什么
Powered by <a target="_blank" href="http://www.typecho.org">Typecho</a> | Theme by <a target="_blank" href="https://www.ihewro.com/archives/489/">handsome</a>添加心知天气
方法1:先在 心知天气 注册自己的帐号,然后生成 JS 代码,填入 (初级设置 → 博客公告消息 )或者直接复制下面的代码粘贴进去也可以
<div id="tp-weather-widget"></div> <script> (function(a,h,g,f,e,d,c,b){b=function(){d=h.createElement(g);c=h.getElementsByTagName(g)[0];d.src=e;d.charset="utf-8";d.async=1;c.parentNode.insertBefore(d,c)};a["SeniverseWeatherWidgetObject"]=f;a[f]||(a[f]=function(){(a[f].q=a[f].q||[]).push(arguments)});a[f].l=+new Date();if(a.attachEvent){a.attachEvent("onload",b)}else{a.addEventListener("load",b,false)}}(window,document,"script","SeniverseWeatherWidget","//cdn.sencdn.com/widget2/static/js/bundle.js?t="+parseInt((new Date().getTime() / 100000000).toString(),10))); window.SeniverseWeatherWidget('show', { flavor: "slim", location: "WX4FBXXFKE4F", geolocation: true, language: "zh-Hans", unit: "c", theme: "auto", token: "89af842b-cab5-4c6e-a464-cf256bcc81db", hover: "enabled", container: "tp-weather-widget" }) </script>方法2:1.知心天气官网www.seniverse.com注册申请免费API 密钥 2.将以下代码放入/usr/themes/handsome/component/headnav.php第108行左右!-- / search form --之后并更换你的公钥秘钥即可
<!-- 知心天气-->
    <div id="tp-weather-widget" class="navbar-form navbar-form-sm navbar-left shift"></div>
<script>(function(T,h,i,n,k,P,a,g,e){g=function(){P=h.createElement(i);a=h.getElementsByTagName(i)[0];P.src=k;P.charset="utf-8";P.async=1;a.parentNode.insertBefore(P,a)};T["ThinkPageWeatherWidgetObject"]=n;T[n]||(T[n]=function(){(T[n].q=T[n].q||[]).push(arguments)});T[n].l=+new Date();if(T.attachEvent){T.attachEvent("onload",g)}else{T.addEventListener("load",g,false)}}(window,document,"script","tpwidget","//widget.seniverse.com/widget/chameleon.js"))</script>
<script>tpwidget("init", {
    "flavor": "slim",
    "location": "WX4FBXXFKE4F",
    "geolocation": "enabled",
    "language": "auto",
    "unit": "c",
    "theme": "chameleon",
    "container": "tp-weather-widget",
    "bubble": "enabled",
    "alarmType": "badge",
    "color": "#C6C6C6",
    "uid": "公钥",
    "hash": "密钥"
});
tpwidget("show");</script>
<!-- 知心结束-->
文章内加一个正文结束
在主题文件/usr/themes/handsome/post.php内

    <div class="entry-content l-h-2x">
 <div style="border-top: 2px dotted #8e8e8e96;height: 0px;margin: 20px 0px;text-align: center;width: 100%;">
 <span style="background-color: #23b7e5;color: #fff;padding: 6px 10px;position: relative;top: -14px;border-radius: 14px;">END</span>
</div>
版权声明
在主题文件post.php内,刚刚加的正文到此结束下加上
<div style="padding: 10px;background: rgba(220, 220, 220, 0.22);font-size: 13px;border-left: 3px solid;text-align: left;">
<span>本文作者:<a href="<?php $this->author->permalink(); ?>" rel="author"> <?php $this->author(); ?></a></span>

<span>文章标题:<a href="<?php $this->permalink() ?>"><?php $this->title() ?></a><br>
<span>本文地址:<a href="<?php $this->permalink() ?>"><?php $this->permalink() ?></a><br>
<span>版权说明:若无注明,本文皆<a href="<?php $this->options->rootUrl(); ?>" target="_blank" data-original-title="<?php $this->options->title() ?>"><?php $this->options->title() ?></a>原创,转载请保留文章出处。</span>
右侧栏加时间流逝
将以下代码加到/usr/themes/handsome/component/sidebar.php,在122行左右,放在<?php endif; ?>之后
<!-- 时间倒计时代码开始 -->
    <section id="blog_info" class="widget widget_categories wrapper-md clear">
        <h5 class="widget-title m-t-none text-md"><?php _me("时间流逝") ?></h5>
    <div class="sidebar sidebar-count">
        <div class="content">
            <div class="item" id="dayProgress">
                <div class="title">今日已经过去<span></span>小时</div>
                <div class="progress">
                    <div class="progress-bar">
                        <div class="progress-inner progress-inner-1"></div>
                    </div>
                    <div class="progress-percentage"></div>
                </div>
            </div>
            <div class="item" id="weekProgress">
                <div class="title">这周已经过去<span></span>天</div>
                <div class="progress">
                    <div class="progress-bar">
                        <div class="progress-inner progress-inner-2"></div>
                    </div>
                    <div class="progress-percentage"></div>
                </div>
            </div>
            <div class="item" id="monthProgress">
                <div class="title">本月已经过去<span></span>天</div>
                <div class="progress">
                    <div class="progress-bar">
                        <div class="progress-inner progress-inner-3"></div>
                    </div>
                    <div class="progress-percentage"></div>
                </div>
            </div>
            <div class="item" id="yearProgress">
                <div class="title">今年已经过去<span></span>个月</div>
                <div class="progress">
                    <div class="progress-bar">
                        <div class="progress-inner progress-inner-4"></div>
                    </div>
                    <div class="progress-percentage"></div>
                </div>
            </div>
        </div>
    </div>
         </section>
    <!-- 时间倒计时代码结束 -->
如下图所示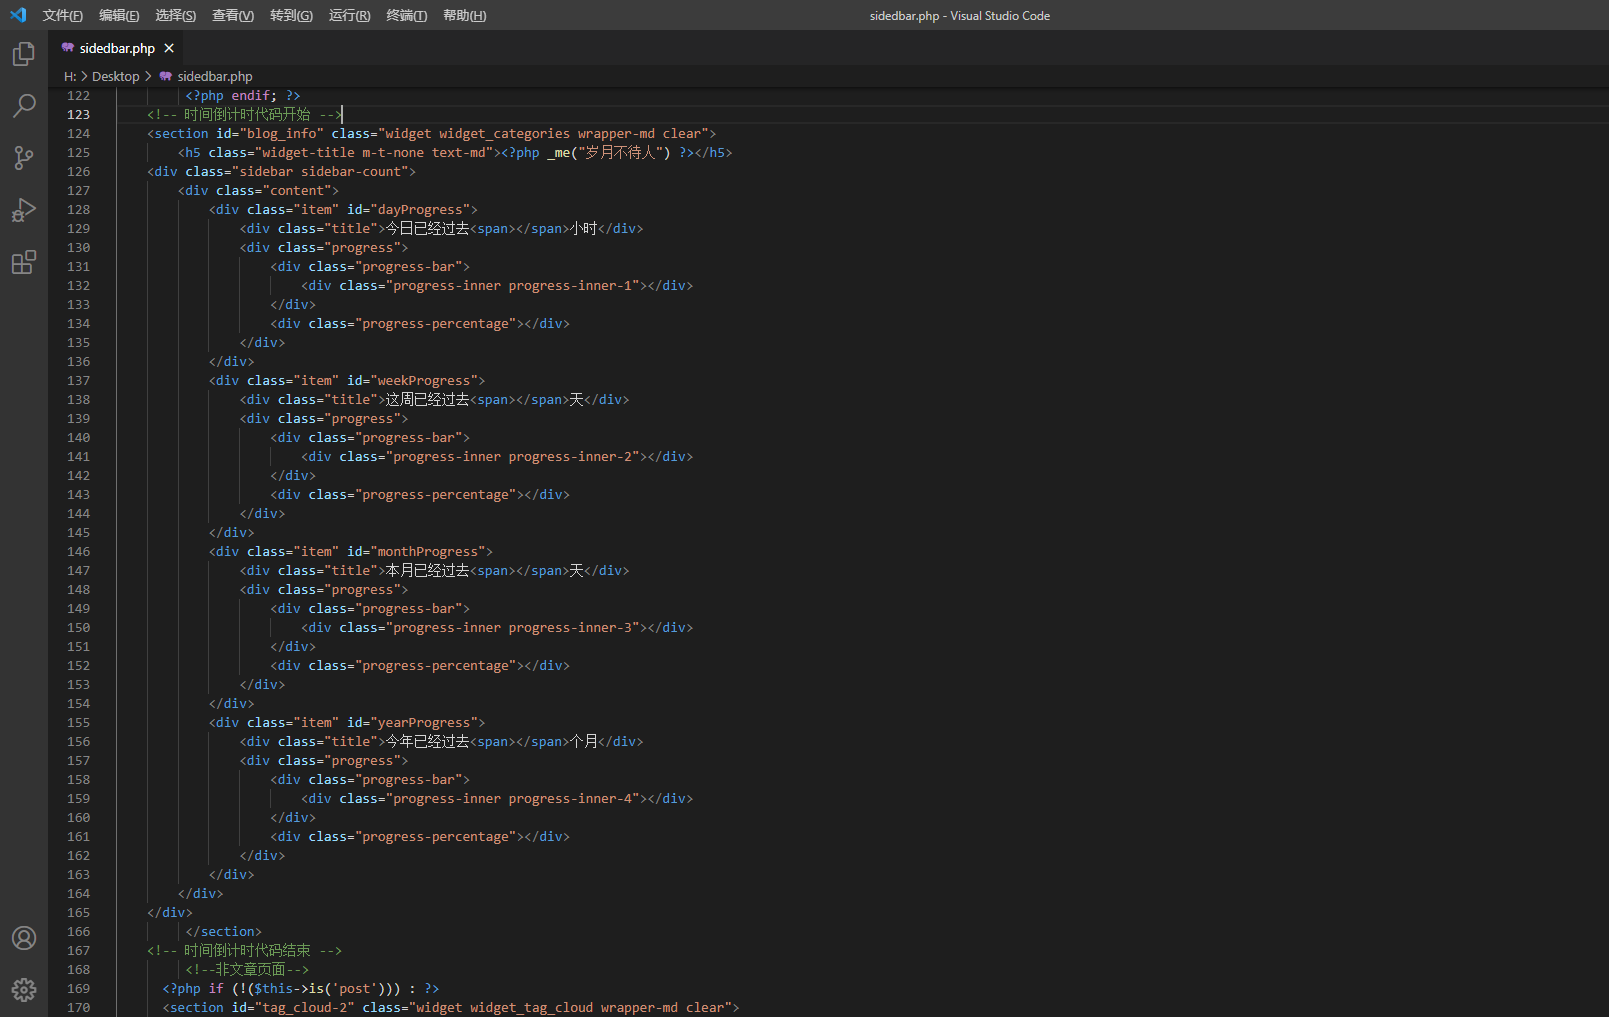
其次
添加完成后,将以下代码放入后台-外观设置-开发者设置-自定义css
/* 时间流逝 */
.sidebar-count .content {
    padding: 15px
}

.sidebar-count .content .item {
    margin-bottom: 15px
}

.sidebar-count .content .item:last-child {
    margin-bottom: 0
}

.sidebar-count .content .item .title {
    font-size: 12px;
    color: var(--minor);
    margin-bottom: 5px;
    display: flex;
    align-items: center
}

.sidebar-count .content .item .title span {
    color: var(--theme);
    font-weight: 500;
    font-size: 14px;
    margin: 0 5px
}

.sidebar-count .content .item .progress {
    display: flex;
    align-items: center
}

.sidebar-count .content .item .progress .progress-bar {
    height: 10px;
    border-radius: 5px;
    overflow: hidden;
    background: var(--classC);
    width: 0;
    min-width: 0;
    flex: 1;
    margin-right: 5px
}
@keyframes progress {
    0% {
        background-position: 0 0
    }

    100% {
        background-position: 30px 0
    }
}
.sidebar-count .content .item .progress .progress-bar .progress-inner {
    width: 0;
    height: 100%;
    border-radius: 5px;
    transition: width 0.35s;
    -webkit-animation: progress 750ms linear infinite;
    animation: progress 750ms linear infinite
}

.sidebar-count .content .item .progress .progress-bar .progress-inner-1 {
    background: #bde6ff;
    background-image: linear-gradient(135deg, #50bfff 25%, transparent 25%, transparent 50%, #50bfff 50%, #50bfff 75%, transparent 75%, transparent 100%);
    background-size: 30px 30px
}

.sidebar-count .content .item .progress .progress-bar .progress-inner-2 {
    background: #ffd980;
    background-image: linear-gradient(135deg, #f7ba2a 25%, transparent 25%, transparent 50%, #f7ba2a 50%, #f7ba2a 75%, transparent 75%, transparent 100%);
    background-size: 30px 30px
}

.sidebar-count .content .item .progress .progress-bar .progress-inner-3 {
    background: #ffa9a9;
    background-image: linear-gradient(135deg, #ff4949 25%, transparent 25%, transparent 50%, #ff4949 50%, #ff4949 75%, transparent 75%, transparent 100%);
    background-size: 30px 30px
}

.sidebar-count .content .item .progress .progress-bar .progress-inner-4 {
    background: #67c23a;
    background-image: linear-gradient(135deg, #4f9e28 25%, transparent 25%, transparent 50%, #4f9e28 50%, #4f9e28 75%, transparent 75%, transparent 100%);
    background-size: 30px 30px
}

.sidebar-count .content .item .progress .progress-percentage {
    color: var(--info)
}
最后
添加完成,将以下代码放入后台-外观设置-开发者设置-自定义输出body尾部
<!-- 时间流逝 -->
<script src="https://www.lxink.cn/usr/themes/handsome/assets/js/timeinfo.js"></script>
响应耗时和访客总数
首先将以下代码加到/usr/themes/handsome/libs/Content.php中,放在class Content{}之前
/*访问总量*/
     function theAllViews(){
             $db = Typecho_Db::get();
             $row = $db->fetchAll('SELECT SUM(VIEWS) FROM `typecho_contents`');
                 echo number_format($row[0]['SUM(VIEWS)']);
     }

    /*响应时间*/
    function timer_start() {
        global $timestart;
        $mtime = explode( ' ', microtime()  );
        $timestart = $mtime[1] + $mtime[0];
        return true;
    }
    timer_start();
    function timer_stop( $display = 0, $precision = 3  ) {
        global $timestart, $timeend;
        $mtime = explode( ' ', microtime()  );
        $timeend = $mtime[1] + $mtime[0];
        $timetotal = number_format( $timeend - $timestart, $precision  );
        $r = $timetotal < 1 ? $timetotal * 1000 . " ms" : $timetotal . " s";
        if ( $display  ) {
            echo $r;
        }
        return $r;
}然后在/usr/themes/handsome/component/sidebar.php文件内,找到博客信息下面添加以下代码
<li class="list-group-item text-second"> <span class="blog-info-icons"> <i data-feather="users"></i></span>
<span class="badge
pull-right"><?php echo theAllViews();?></span><?php _me("访客总数") ?></li>
<li class="list-group-item text-second"> <span class="blog-info-icons"> <i data-feather="refresh-ccw"></i></span>
<span class="badge
pull-right"><?php echo timer_stop();?></span><?php _me("响应耗时") ?></li>
百度收录检测
修改 1.在模板post.php加入(我是handsome)
<!--百度收录-->
<li class="meta-baidu"><span class="post-icons"><i class="glyphicon glyphicon-refresh" id="baidu_icon"></i></span><span class="meta-value" id="baidu_result">加载中</span></li>2.还是在post.php内加入(必须引入jquery)
<script>
    function baidu_check(){
        $.getJSON("https://cn1.api.wfblog.net/baidu.php?domain="+window.location.href,function(result){
            if (result.code == 200) {
                $('#baidu_icon').removeClass('glyphicon-refresh');
                $('#baidu_icon').addClass('glyphicon-ok-circle');
                $('#baidu_result').text('百度已收录');
            }else if(result.code == 403){
                $('#baidu_icon').removeClass('glyphicon-refresh');
                $('#baidu_icon').addClass('glyphicon-info-sign');
                $('#baidu_result').text('百度未收录');
                baidu_push();
            }else{
                 $('#baidu_icon').removeClass('glyphicon-refresh');
                $('#baidu_icon').addClass('glyphicon-remove-circle');
                $('#baidu_result').text('查询收录失败');
            }
        });
    }
    function baidu_push(){
        var bp = document.createElement('script');
        var curProtocol = window.location.protocol.split(':')[0];
        if (curProtocol === 'https') {
            bp.src = 'https://zz.bdstatic.com/linksubmit/push.js';
        } else {
            bp.src = 'http://push.zhanzhang.baidu.com/push.js';
        }
        var s = document.getElementsByTagName("script")[0];
        s.parentNode.insertBefore(bp, s);
    }
    baidu_check();
</script>3.pjax回调函数
<!--百度收录-->
if((typeof baidu_check) !== "undefined"){

baidu_check();
}
其他模板
1.在模板functions.php末尾合适处加入以下代码
function baidu_check() {
    $url = baidu_url();
    $api = 'https://cn1.api.wfblog.net/baidu.php?domain='; //更改为你自己的API
    $result = json_decode(file_get_contents($api.$url));
    if($result['code'] == 200){
        echo '百度已收录';
    }elseif($result['code'] == 403){
        echo '<a style="color:red;" rel="external nofollow" title="点击提交收录" target="_blank" href="http://zhanzhang.baidu.com/sitesubmit/index?sitename='.$url.'">百度未收录</a>';
    }else{
        echo '查询收录失败';
    }
}
function baidu_url(){
    if((isset($_SERVER['HTTPS']) && $_SERVER['HTTPS'] == 'on') || (isset($_SERVER['HTTP_X_FORWARDED_PROTO']) && $_SERVER['HTTP_X_FORWARDED_PROTO'] == 'https')){
        return 'https'.'://'.$_SERVER['HTTP_HOST'].$_SERVER['REQUEST_URI'];
    }else{
        return 'http'.'://'.$_SERVER['HTTP_HOST'].$_SERVER['REQUEST_URI'];
    }
}
2.然后在你需要输出检测结果的地方加入``即可
API源码
<?php
/**
 * Baidu
 * @editer: Weifeng
 * @link: https://wfblog.net
 * @version: 1.0
 */

error_reporting(0);
header("Access-Control-Allow-Origin:*");
header('Content-type: application/json');

$domain = @$_GET['domain'];
if(!isset($domain) || empty($domain) || $domain==''){
    $data = array(
        "code" => false,
        "msg" => "未传入请求参数!"
    );
    echo json_encode($data,JSON_UNESCAPED_UNICODE);
    exit;
}
if(substr($domain, -1) == '/'){
    $domain = substr($domain,0,strlen($domain)-1);
}

$data = checkBaidu($domain);
echo json_encode($data,JSON_UNESCAPED_UNICODE);

function checkBaidu($url){
    $header = array(
        "Host:www.baidu.com",
        "Content-Type:application/x-www-form-urlencoded",//post请求
        "Connection: keep-alive",
        "Referer:https://www.baidu.com",
        "User-Agent: Mozilla/5.0 (Windows NT 10.0; Win64; x64) AppleWebKit/537.36 (KHTML, like Gecko) Chrome/80.0.3987.162 Safari/537.36"
    );
    $url = 'https://www.baidu.com/s?ie=UTF-8&wd='.urlencode($url).'&usm=3&rsv_idx=2&rsv_page=1';
    $ch = curl_init();
    curl_setopt($ch, CURLOPT_URL, $url);
    curl_setopt ($ch, CURLOPT_HTTPHEADER, $header);
    curl_setopt($ch, CURLOPT_FOLLOWLOCATION,1);
    curl_setopt($ch, CURLOPT_RETURNTRANSFER, 1);
    $output = curl_exec($ch);
    curl_close($ch);
    if(strpos($output, '没有找到') || strpos($output, '很抱歉')){
        $data = array(
            "code" => 403,
            "msg" => "该域名暂时未被百度收录!"
        );
    }else{
        $number = GetBetween($output,'<span class="nums_text">百度为您找到相关结果约','个</span>');
        if(empty($number) || $number == 0){
            $number = GetBetween($output,'<b>找到相关结果数约','个</b></p>');
            if(empty($number) || $number == 0){
                $data = array(
                    "code" => false,
                    "msg" => "获取百度收录失败!"
                );
                return $data;
            }
        }
        $data = array(
            "code" => 200,
            "msg" => "该域名已被百度收录!",
            "number" => str_replace(',','',$number)
        );
    }
    return $data;
}

function GetBetween($content,$start,$end){
    $r = explode($start, $content);
    if (isset($r[1])){
        $r = explode($end, $r[1]);
        return $r[0];
    }
}
?>
右侧边栏百度收录
注意API挂了会影响网站打开慢或者打不开等情况,请自行删除一下代码!
将下方代码粘贴至/usr/themes/handsome/component目录下的sidebar.php文件内。
的博客信息下方合适位置
<!--百度收录-->
<script> <?php //查询本站收录域名
function baidu($baidu){ $url= $_SERVER['HTTP_HOST'];
$baidu="http://api.jybkw.cn/baidu/?domain=$url";
$str = file_get_contents($baidu); preg_match_all('/\d+/',$str,$arr);
$arr=join('',$arr[0]); echo $arr; } ?>
</script class="fa fa-paw" aria-hidden="true">
            <!--百度收录-->
           <li class="list-group-item text-second"><span class="blog-info-icons"> <i class="fa fa-paw"></i></span> <span
                       class="badge
           pull-right"><?php echo baidu($baidu) ?></span><?php _me("百度收录") ?></li>
右侧边栏添加全站字数
在 component/sidebar.php的开头加入下面的代码:
<?php
//字数统计
function allOfCharacters() {
    $chars = 0;
    $db = Typecho_Db::get();
    $select = $db ->select('text')->from('table.contents');
    $rows = $db->fetchAll($select);
    foreach ($rows as $row) { $chars += mb_strlen(trim($row['text']), 'UTF-8'); }
    $unit = '';
    if($chars >= 10000)     { $chars /= 10000; $unit = '万'; }
    else if($chars >= 1000) { $chars /= 1000;  $unit = '千'; }
    $out = sprintf('%.2lf %s',$chars, $unit);
    return $out;
}
?>
在 component/sidebar.php处,选择合适位置加入以下代码(位置大概在 90 多行)
<li class="list-group-item text-second"><span class="blog-info-icons"><i data-feather="edit-2"></i></span>
               <span class="badge
           pull-right"><?php echo allOfCharacters(); ?></span><?php _me("全站字数") ?></li>
一键评论打卡
此教程仅以Handsome主题为例 其他主题请修改相应代码
1.首先在后台-->设置外观-->开发者设置-->自定义JavaScript加入以下代码: PJAX回调函数也加入这个代码
function a(a, b, c) {
        if (document.selection) a.focus(), sel = document.selection.createRange(), c ? sel.text = b + sel.text + c : sel.text = b, a.focus();
        else if (a.selectionStart || "0" == a.selectionStart) {
            var l = a.selectionStart,
                m = a.selectionEnd,
                n = m;
            c ? a.value = a.value.substring(0, l) + b + a.value.substring(l, m) + c + a.value.substring(m, a.value.length) : a.value = a.value.substring(0, l) + b + a.value.substring(m, a.value.length);
            c ? n += b.length + c.length : n += b.length - m + l;
            l == m && c && (n -= c.length);
            a.focus();
            a.selectionStart = n;
            a.selectionEnd = n
        } else a.value += b + c, a.focus()
}
var b = (new Date).toLocaleTimeString(),
        c = document.getElementById("comment") || 0;
window.SIMPALED = {};
window.SIMPALED.Editor = {
    daka: function() {
        a(c, "滴!学生卡!打卡时间:" + b, ",请上车的乘客系好安全带~")
    },
    zan: function() {
        a(c, " 写得好好哟,我要给你生猴子!::funny:04:: ")
    },
    cai: function() {
        a(c, "骚年,我怀疑你写了一篇假的文章!::funny:03:: ")
    }
};
2.打开主题目录的component/comments.php里面的126行到144行附近:
<div class="comment-form-comment form-group">
                        <label for="comment"><?php _me("评论") ?>
                            <span class="required text-danger">*</span></label>
                        <textarea id="comment" class="textarea form-control OwO-textarea" name="text" rows="5" placeholder="<?php _me("说点什么吧……") ?>" onkeydown="if(event.ctrlKey&&event.keyCode==13){document.getElementById('submit').click();return false};"><?php $this->remember('text'); ?></textarea>
                        <div class="OwO" style="display: inline;"></div>
                                            <div class="OwO" title="打卡" style="display: inline;" onclick="javascript:SIMPALED.Editor.daka();this.style.display='none'"><div class="OwO-logo"><i class="fontello-pencil"></i><span class="OwOlogotext">打卡</span></div></div>
              <div class="OwO" title="赞" style="display: inline;" onclick="javascript:SIMPALED.Editor.zan();this.style.display='none'"><div class="OwO-logo"><i class="glyphicon glyphicon-thumbs-up"></i><span class="OwOlogotext"></span></div></div>
          <div class="OwO" title="踩" style="display: inline;" onclick="javascript:SIMPALED.Editor.cai();this.style.display='none'"><div class="OwO-logo"><i class="glyphicon glyphicon-thumbs-down"></i><span class="OwOlogotext"></span></div></div>
                        <div class="secret_comment" id="secret_comment" data-toggle="tooltip"
                        data-original-title="<?php _me("开启该功能,您的评论仅作者和评论双方可见") ?>">
                            <label class="secret_comment_label control-label"><?php _me("私密评论") ?></label>
                            <div class="secret_comment_check">
                                <label class="i-switch i-switch-sm bg-dark m-b-ss m-r">
                                    <input type="checkbox" id="secret_comment_checkbox">
                                    <i></i>
                                </label>
                            </div>
                        </div>
                    </div>
3.在后台-->设置外观-->开发者设置-->自定义CSS加入以下代码:
.secret_comment {
    top: 5px;
}
.OwO.OwO-open .OwO-body {
    display:table
}
效果
见文章下方评论
博客介绍打字效果
首页左侧博主介绍 将以下代码添加至后台-外观-初级设置-博主的介绍。
<span class="text-muted text-xs block">
<div id="chakhsu"></div>
<script>
    var chakhsu = function (r) {
        function t() {
            return b[Math.floor(Math.random() * b.length)]}
        function e() {
            return String.fromCharCode(94 * Math.random() + 33)}
        function n(r) {
            for (var n = document.createDocumentFragment(), i = 0; r > i; i++) {
                var l = document.createElement("span"); l.textContent = e(), l.style.color = t(), n.appendChild(l) }
            return n}
        function i() {
            var t = o[c.skillI];
            c.step ? c.step-- : (c.step = g, c.prefixP < l.length ? (c.prefixP >= 0 && (c.text += l[c.prefixP]), c.prefixP++) : "forward" === c.direction ? c.skillP < t.length ? (c.text += t[c.skillP], c.skillP++) : c.delay ? c.delay-- : (c.direction = "backward", c.delay = a) : c.skillP > 0 ? (c.text = c.text.slice(0, -1), c.skillP--) : (c.skillI = (c.skillI + 1) % o.length, c.direction = "forward")), r.textContent = c.text, r.appendChild(n(c.prefixP < l.length ? Math.min(s, s + c.prefixP) : Math.min(s, t.length - c.skillP))), setTimeout(i, d) }
        /*以下内容自定义修改*/ var l = "❤", o = ["我爱吃土豆" ].map(
        function (r) {
            return r + ""}), a = 2, g = 1, s = 5, d = 75, b = ["rgb(110,64,170)", "rgb(150,61,179)", "rgb(191,60,175)", "rgb(228,65,157)", "rgb(254,75,131)", "rgb(255,94,99)", "rgb(255,120,71)", "rgb(251,150,51)", "rgb(226,183,47)", "rgb(198,214,60)", "rgb(175,240,91)", "rgb(127,246,88)", "rgb(82,246,103)", "rgb(48,239,130)", "rgb(29,223,163)", "rgb(26,199,194)", "rgb(35,171,216)", "rgb(54,140,225)", "rgb(76,110,219)", "rgb(96,84,200)"], c = {text: "", prefixP: -s, skillI: 0, skillP: 0, direction: "forward", delay: a, step: g}; i()
    };
    chakhsu(document.getElementById('chakhsu'));
</script></span> </span
首页倒计时
将以下代码添加至后台-开发者设置-首页列表最前方广告位。
/*首页倒计时*/
<style>
.gn_box{     border: none;     border-radius: 15px; }
.gn_box {     padding: 10px 14px;     margin: 10px;     margin-bottom: 20px;     text-align: center;     background-color: #fff; }
#t_d{     color: #982585;     font-size: 18px; }
#t_h{     color: #8f79c1;     font-size: 18px; }
#t_m{     color: #65b4b5;     font-size: 18px; }
#t_s{     color: #83caa3;     font-size: 18px; }
</style>
<div class="gn_box">
<h1><font color=#E80017>2</font><font color=#D1002E>0</font><font color=#BA0045>2</font><font color=#A3005C>1</font><font  color=#8C0073>年</font><font color=#75008A>-</font>
<font color=#5E00A1>新</font><font color=#4700B8>年</font><font color=#3000CF>倒</font><font color=#1900E6>计</font><font color=#0200FD>时</font></h1><center>
<div id="CountMsg" class="HotDate"><span id="t_d"> 天</span><span id="t_h"> 时</span><span id="t_m"> 分</span><span id="t_s"> 秒</span></div></center>
<script type="text/javascript">
function getRTime() {
    var EndTime = new Date('2021/01/01 00:00:00');
    var NowTime = new Date();
    var t = EndTime.getTime() - NowTime.getTime();
    var d = Math.floor(t / 1000 / 60 / 60 / 24);
    var h = Math.floor(t / 1000 / 60 / 60 % 24);
    var m = Math.floor(t / 1000 / 60 % 60);
    var s = Math.floor(t / 1000 % 60);
    var day = document.getElementById("t_d");
    if (day != null) {
        day.innerHTML = d + " 天";
    }
    var hour = document.getElementById("t_h");
    if (hour != null) {
        hour.innerHTML = h + " 时";
    }
    var min = document.getElementById("t_m");
    if (min != null) {
        min.innerHTML = m + " 分";
    }
    var sec = document.getElementById("t_s");
    if (sec != null) {
        sec.innerHTML = s + " 秒";
    }
}
setInterval(getRTime, 1000);
</script> </div>
404页面自动返回
打开/usr/themes/handsome/404.php,在第130行左右,在 h1 class="text-shadow text-white">404 后面添加:
<br>
<small class="text-muted letterspacing">
<b id="sp">10</b>秒后自动返回···<br>
<a class="text-muted letterspacing" href="#" onclick="javascript:history.go(-1);">立刻返回</a>然后把下面这段放到最后的/body前
<script type="text/javascript">
onload = function(){setInterval(go, 1000);};var x=10;
function go() {x--;if(x>0) {document.getElementById("sp").innerHTML = x;}else{history.go(-1);}}
</script>
时光机添加置顶视频
将以下代码分别添加至/usr/themes/handsome/component/ssy.php的?php if ($comments->have()): ?> div class="streamline b-l m-l-lg m-b padder-v"之后
<!--梦想视频-->
<div id="comment-867" class="comment-body comment-parent comment-odd comment-by-author">
<div class="panel-heading pos-rlt b-b b-light">
<center>你的梦想是什么!</center>
</div>
<div class="panel-body">
<p><video src="视频地址" style="background-image:url(视频封面图);background-size: cover;" preload="preload"></video><div class="play-button"></div></p> </div>
</div>
首页全站友链显示图片
在aside.php里面大约210行的地方修改代码,在a标签内加上:
<img style=\"width:18px;height:18px;border-radius:50%;margin-right:3px;\" src=或者复制下方全部代码替换
<!--使用links插件,输出全站友链-->
                 <?php $mypattern1 = "<li data-original-title=\"{title}\" data-toggle=\"tooltip\"
data-placement=\"top\"><a rel='noopener' href=\"{url}\" target=\"_blank\"><img style=\"width:18px;height:18px;border-radius:50%;margin-right:3px;\" src=\"{image}\" /><span>{name}</span></a></li>";
                  Handsome_Plugin::output($mypattern1, 0, "ten");?>
                </ul>
              </li>
侧边栏添加二维码
打开/usr/themes/handsome/component文件夹下的sidebar.php在大概81行的section之后,也就是随机文章那一块之后,博客信息之前。当然具体位置可以按照自己的喜好来。
后面另起一行,填入以下的代码保存即可:
<section  id="blog_qrurl" class="widget widget_categories wrapper-md clear">

        <script type="text/javascript" src="//cdn.staticfile.org/jquery/2.1.1/jquery.min.js"></script>
        <script type="text/javascript" src="//static.runoob.com/assets/qrcode/qrcode.min.js"></script>
          <h5 class="widget-title m-t-none text-md"><?php _me("移动端阅读") ?></h5>
          <style>
              #qrcode img{
                  max-width: 100%;
              }
              @media (max-width: 767px){
                  #qrcode{
                      display: none;
                  }
              }

          </style>
          <div id="qrcode"></div>
          <script>
            var elText = window.location.href;
            new QRCode(document.getElementById("qrcode"), elText);
          </script>

      </section>
版权美化教程
先把CSS代码复制到自定义CSS
/*底部页脚*/
.github-badge {
  display: inline-block;
  border-radius: 4px;
  text-shadow: none;
  font-size: 12px;
  color: #fff;
  line-height: 15px;
  background-color: #abbac3;
  margin-bottom: 5px
}
.github-badge .badge-subject {
  display: inline-block;
  background-color: #f6b044;
  padding: 4px 4px 4px 6px;
  border-top-left-radius: 4px;
  border-bottom-left-radius: 4px
}
.github-badge .badge-value {
  display: inline-block;
  padding: 4px 6px 4px 4px;
  border-top-right-radius: 4px;
  border-bottom-right-radius: 4px
}
.github-badge .bg-blue {
  background-image: -webkit-linear-gradient(0deg, #3ca5f6 0%, #a86af9 100%);
}
.github-badge .bg-orange {
  background-color: #fadfa3
}
.github-badge .bg-red {
  background-color: #f00
}
.github-badge .bg-green {
    background: linear-gradient(to right , #7A88FF, #d27aff);
.github-badge .bg-purple {
  background-color: #ab34e9
}
左侧代码,复制到 博客底部左侧信息
<!-- 左侧底部 -->

    <div class="github-badge">
     <a href="./" title="©2020 MuYu">
      <span class="badge-subject">Copyright</span><span class="badge-value bg-blue">©2020 MuYu</span>
       </a>
      </div>
 |
     <div class="github-badge">
    <a href="https://beian.miit.gov.cn/" target="_blank" title="闽ICP备18027703号-2" style="pointer;">
   <span class="badge-subject"><img src="/img/beian.png" style="height: 1em;"> 闽ICP备</span><span class="badge-value bg-green">18027703号-2</span>
</a>
</div>
<P>`右侧代码,复制到 `博客底部右侧信息
<!-- 右侧底部 -->
<span class="pull-right hidden-xs text-ellipsis">
<?php $this->options->BottomInfo(); ?>
<div class="github-badge">
<a href="http://www.typecho.org" target="_blank" title="由 Typecho 强力驱动" style="pointer;">
<span class="badge-subject">Theme</span><span class="badge-value bg-blue">Typecho</span>
</a>
</div>
|
<div class="github-badge">
<a href="https://www.ihewro.com/archives/489/" target="_blank" title="Theme by Handsome" style="pointer;">
<span class="badge-subject">Theme</span><span class="badge-value bg-orange">Handsome</span>
</a>
</div>
</span>文件修改法,上方方法可能需要自行更改代码。
可以按下方截图自行修改/usr/themes/handsome/component/footer.php代码
页脚美化
将以下代码,替换到下方/usr/themes/handsome/component/footer.php截图的位置。
原有代码忘记了,所以看着来啦
<div class="wrapper bg-light" style="background-color: #FFF;">还没结束哦,如果发现显示高度不对齐的话在后台自定义CSS上加入,下方代码。高度按自己来调整
/* 底部样式修复 */
.wrapper{
padding: 11px;
}
滚动条显示位置百分比
好了,教程很简单,在网站添加html代码,然后在js添加监测代码,最后用css显示出来,以Typecho为例,修改前记得备份源文件。首先打开模板的header.php文件,复制以下代码,粘贴在网页之后,如图。
<div id="percentageCounter"></div>下面代码添加到后台自定义 JavaScript
//加载显示
$(window).scroll(function() {
    var a = $(window).scrollTop(),
    c = $(document).height(),
    b = $(window).height();
    scrollPercent = a / (c - b) * 100;
    scrollPercent = scrollPercent.toFixed(1);
    $("#percentageCounter").css({
        width: scrollPercent + "%"
    });
}).trigger("scroll");
下面代码添加至后台自定义CSS
#percentageCounter {
    position:fixed;
    left:0;
    top:0;
    height:3px;
    z-index:99999;
    background-color:#448EF6;
}
首页广告轮播图
添加至后台首页列表最前方广告位
<div id="index-carousel" class="box-shadow-wrap-normal border-radius-6 carousel slide m-b-md" data-ride="carousel"> <ol class="carousel-indicators"><li data-target="#index-carousel" data-slide-to="0" class=""></li><li data-target="#index-carousel" data-slide-to="1" class="active"></li></ol> <div class="carousel-inner border-radius-6" role="listbox"><div class="item border-radius-6"> <a href="https://muyu.love/" style="cursor: url("https://cos.muyu.love/usr/plugins/AliceStyle/static/mouse/fireworks/link.cur"), pointer;"> <img class="border-radius-6" src="https://cdn.muyu.love/2020/11/02/1604286012.png" data-holder-rendered="true"> <div class="carousel-caption"> <h3>愿你走出半生</h3> <p>归来仍是少年</p> </div> </a> </div><div class="item border-radius-6 active"> <a href="https://muyu.love/" style="cursor: url("https://cos.muyu.love/usr/plugins/AliceStyle/static/mouse/fireworks/link.cur"), pointer;"> <img class="border-radius-6" src="https://cdn.muyu.love/2020/11/02/1604286898.png" data-holder-rendered="true"> <div class="carousel-caption"> <h3> </h3> <p> </p> </div> </a> </div></div> <a class="left carousel-control" href="#index-carousel" role="button" data-slide="prev" style="cursor: url("https://cos.muyu.love/usr/plugins/AliceStyle/static/mouse/fireworks/link.cur"), pointer;"> <svg class="glyphicon-chevron-left" viewBox="0 0 24 24" width="24" height="24" stroke="currentColor" stroke-width="2" fill="none" stroke-linecap="round" stroke-linejoin="round"><polyline points="15 18 9 12 15 6"></polyline></svg> <span class="sr-only">Previous</span> </a> <a class="right carousel-control" href="#index-carousel" role="button" data-slide="next" style="cursor: url("https://cos.muyu.love/usr/plugins/AliceStyle/static/mouse/fireworks/link.cur"), pointer;"> <svg xmlns="http://www.w3.org/2000/svg" width="24px" height="24px" viewBox="0 0 24 24" fill="none" stroke="currentColor" stroke-width="2" stroke-linecap="round" stroke-linejoin="round" class="glyphicon-chevron-right" aria-hidden="true"><polyline points="9 18 15 12 9 6"></polyline></svg> <span class="sr-only">Next</span> </a></div>左侧栏自修改
请做好备份!
建议引入 Font Awesome 图标库,在 主题后台设置 -> 开发者设置 -> 自定义输出 head 头部的 HTML 代码 里面添加下面的代码即可
<link href="https://cdn.bootcss.com/font-awesome/4.7.0/css/font-awesome.min.css" rel="stylesheet">
上面的 Font Awesome 的 css 文件来自 BootCDN 提供,你也可以替换成自己的文件。
首先,打开 libs/Content.php ,在蓝线所示的位置:
插入下面的代码:
/**
 *
 * @param $categories
 * @return string
 */
public static function returnAsideCategories($categories){
    $html    = "";
    $options = mget();
    $icons   = array(
        'default' => 'glyphicon glyphicon-tasks',
        'github'  => 'fa fa-github'
        /**
         *  格式:  '分类缩略名' => '图标名称',
         */
    );
    while($categories->next()) {
        if ($categories->levels === 0) {
            $children = $categories->getAllChildren($categories->mid);
            if (!empty($children)) {
                $html .= '<li><a class="auto"><span class="pull-right text-muted"><i class="fontello icon-fw fontello-angle-right text"></i><i class="fontello icon-fw fontello-angle-down text-active"></i></span><span class="nav-icon"><i class="' . $icons[$categories->slug] . '"></i></span><span>' . $categories->name . '</span></a>';
                $childCategoryHtml =  '<ul class="nav nav-sub dk"><li class="nav-sub-header"><a><span>' . $categories->name . '</span></a></li>';
                foreach($children as $mid){
                    $child = $categories->getCategory($mid);
                    $childCategoryHtml .= '<li><a href="' . $child['permalink'] . '"><b class="badge pull-right">' . $child['count'] . '</b><i class="' . $icons[$child['slug']] . '"></i><span>' . $child['name'] . '</span></a></li>';
                }
                $childCategoryHtml .= '</ul>';
                $html .= $childCategoryHtml;
                $html .= "</li>";
            } else {
                $html .= '<li><a href="' . $categories->permalink . '" class="auto"><b class="badge pull-right">' . $categories->count . '</b><span class="nav-icon"><i class="'.$icons[$categories->slug].'"></i></span><span>' . $categories->name . '</span></a></li>';
            }
        }
    }
    return $html;
}
在 component/aside.php 中找到以下代码(大约 131 ~ 160 行),删除。
<!--分类category-->
                <?php
                $class = "";
                    if (in_array("openCategory",$this->options->featuresetup)){
                        $class = "class=\\"active\\"";
                    }
                    ?>
              <li <?php echo $class; ?>>
                <a class="auto">
                  <span class="pull-right text-muted">
                    <i class="fontello icon-fw fontello-angle-right text"></i>
                    <i class="fontello icon-fw fontello-angle-down text-active"></i>
                  </span>
<!--                  <i class="glyphicon glyphicon-th"></i>-->
                    <span class="nav-icon"><i data-feather="grid"></i></span>

                    <span><?php _me("分类") ?></span>
                </a>
                <ul class="nav nav-sub dk">
                  <li class="nav-sub-header">
                    <a>
                      <span><?php _me("分类") ?></span>
                    </a>
                  </li>
                  <!--循环输出分类-->
                    <?php
                    $this->widget('Widget_Metas_Category_List')->to($categorys);
                    echo Content::returnCategories($categorys) ?>
                </ul>
              </li>
然后在下图蓝线所示的位置( 127 行左右 )
插入以下代码:
<!--start-->
              <li class="line dk"></li>

            <!--Components-->
              <li class="hidden-folded padder m-t m-b-sm text-muted text-xs">
                <span><?php _me("分类") ?></span>
              </li>
              <!--分类category-->
              <!--循环输出分类-->
              <?php
              $this->widget('Widget_Metas_Category_List')->to($categorys);
              echo Content::returnAsideCategories($categorys) ?>
              <!--end-->
然后,刷新你的博客,是不是就有效果了呢?
设置图标
设置方法:在 $icons 的 array 数组中插入 '分类缩略名' => '图标' 即可。
有人可能不知道在哪里哈(其实是我不知道 )
在/handsome/libs/content.php中,我们可以看到有这么一行$icons = array(,下面包含着像是'system' => 'fa fa-apple',这样的代码,那你就找对了,接下来看怎么设置吧~
请记住最后一句不能加逗号!!
'music' => 'fa fa-music',
    'life' => 'fa fa-meetup' //这是最后一句,没有逗号!!
如果你引入了 Font Awesome 的图标的话,可以到 https://fontawesome.dashgame.com/ 选择你喜欢的图标使用。
使用样例使用 archive 图标时:
对应在 $icons 的 array 数组中插入的代码:
'archives' => 'fa fa-archive'
Fontello
handsome 主题自带部分 fontello 图标,具体列表可在 handsome 主题文档 查看。
使用方法
在图标的名字前加入 fontello fontello- 即可。
**使用样例
与 Font Awesome 相似,在此不多赘述。
Feather
handsome 主题自带 feather 的所有图标,在此处使用需要一些变通措施。
使用方法
在 https://feathericons.com/ 选取好你需要的图标。
然后在名称前插入 " data-feather=" ,再输入名称即可。
**使用样例
以 airplay 为例:
输入 'airplay' => '" data-feather="airplay' 即可。
其他 SVG 格式的图标
使用方法
在 svg 的开头加入 "> ,在结尾加入 ` 即可。
使用样例
下载下来的 svg 文件内容:
将其复制,然后在 $icons 的 array 数组中插入的代码:
'airplay' => '"></i><svg xmlns="http://www.w3.org/2000/svg" width="16" height="16" viewBox="0 0 24 24" fill="none" st首页快捷搜索
下面代码添加至后台
首页列表最前方广告位
<div class="row visible-lg visible-md"><div class="col-lg-12"><div class="panel panel-default"><div class="panel-heading"><i class="fa fa-search" aria-hidden="true"></i> 快捷搜索 </div><div class="panel-body"><div class="nav-tabs-alt"><ul class="nav nav-tabs nav-justified"><li class="active"><a data-target="#tab-1" role="tab" data-toggle="tab" aria-expanded="true">百度</a></li><li class=""><a data-target="#tab-2" role="tab" data-toggle="tab" aria-expanded="false">搜狗</a></li><li class=""><a data-target="#tab-3" role="tab" data-toggle="tab" aria-expanded="false">360</a></li><li class=""><a data-target="#tab-4" role="tab" data-toggle="tab" aria-expanded="false">必应</a></li><li class=""><a data-target="#tab-5" role="tab" data-toggle="tab" aria-expanded="false">谷歌</a></li></ul></div><div class="row-row"><div class="cell scrollable hover"><div class="cell-inner"><div class="tab-content"><div class="tab-pane active" id="tab-1"><div class="wrapper-md"><div class="input-group m-b"><span class="input-group-addon">百度搜索</span><input type="text" id="baidu" class="form-control" placeholder="请输入搜索内容"></div><div class="text-center"><button class="btn m-b-xs w-xs btn-info" onclick="window.open('https://www.baidu.com/s?ie=UTF-8&wd='+$('#baidu').val())">搜索</button></div></div></div><div class="tab-pane" id="tab-2"><div class="wrapper-md"><div class="input-group m-b"><span class="input-group-addon">搜狗搜索</span><input type="text" id="sogou" class="form-control" placeholder="请输入搜索内容"></div><div class="text-center"><button class="btn m-b-xs w-xs btn-info" onclick="window.open('https://www.sogou.com/web?_asf=www.gqink.cn&query='+$('#sogou').val())">搜索</button></div></div></div><div class="tab-pane" id="tab-3"><div class="wrapper-md"><div class="input-group m-b"><span class="input-group-addon">360搜索</span><input type="text" id="so" class="form-control" placeholder="请输入搜索内容"></div><div class="text-center"><button class="btn m-b-xs w-xs btn-info" onclick="window.open('https://www.so.com/s?ie=utf-8&fr=www.gqink.cn&src=www.gqink.cn&q='+$('#so').val())">搜索</button></div></div></div><div class="tab-pane" id="tab-4"><div class="wrapper-md"><div class="input-group m-b"><span class="input-group-addon">必应搜索</span><input type="text" id="bing" class="form-control" placeholder="请输入搜索内容"></div><div class="text-center"><button class="btn m-b-xs w-xs btn-info" onclick="window.open('https://cn.bing.com/search?qs=n&form=www.gqink.cn&scope=web&sp=-1&q='+$('#bing').val())">搜索</button></div></div></div><div class="tab-pane" id="tab-5"><div class="wrapper-md"><div class="input-group m-b"><span class="input-group-addon">谷歌搜索</span><input type="text" id="Google" class="form-control" placeholder="请输入搜索内容"></div><div class="text-center"><button class="btn m-b-xs w-xs btn-info" onclick="window.open('https://www.google.com/search?q='+$('#Google').val())">搜索</button></div></div></div></div></div></div></div></div></div></div></div>为typecho站点设置多个域名
打开程序目录的这个文件 /var/Widget/Options.php
使用搜索找到这个位置
/** 初始化站点信息 */
        if (defined('__TYPECHO_SITE_URL__')) {
            $this->siteUrl = __TYPECHO_SITE_URL__;
        }
上面的代码最前面加入下面的代码(域名改成你自己的)
if($_SERVER['SERVER_NAME']=='www.muyu.com'){//chen added
    $this->siteUrl = 'http://www.muyu.com';
}
超链接特效
修改 /usr/themes/handsome/assets/css/handsome.min.css,删除这两节:
.comment-content-true a:hover,.wrapper-lg .entry-content a:hover{
color:#222;border-bottom-color:#222
}
.comment-content-true a,.wrapper-lg .entry-content a{
color:#58666e;border-bottom-color:#222;border-bottom:1px solid #999;word-wrap:break-word;word-break:break-all
}
后台 自定义CSS:
/*超链接特效*/
.comment-content-true a:not(.light-link):not(.post_inser_a),.wrapper-lg .entry-content a:not(.light-link):not(.post_inser_a){position:relative;margin:auto 4px;color:#23b7e5;-webkit-transition:color .3s;transition:color .3s;-webkit-perspective:600px;perspective:600px;-webkit-perspective-origin:50% 100%;perspective-origin:50% 100%;word-wrap:break-word;word-break:break-all;white-space:nowrap;text-overflow:ellipsis;overflow:hidden;max-width:inherit;width:inherit}
.comment-content-true a:not(.light-link):not(.post_inser_a):focus,.comment-content-true a:not(.light-link):not(.post_inser_a):hover,.wrapper-lg .entry-content a:not(.light-link):not(.post_inser_a):focus,.wrapper-lg .entry-content a:not(.light-link):not(.post_inser_a):hover{color:#fff}
.comment-content-true a:not(.light-link):not(.post_inser_a)::after,.comment-content-true a:not(.light-link):not(.post_inser_a)::before,.wrapper-lg .entry-content a:not(.light-link):not(.post_inser_a)::after,.wrapper-lg .entry-content a:not(.light-link):not(.post_inser_a)::before{position:absolute;top:0;left:-4px;z-index:-1;box-sizing:content-box;padding:0 4px;width:100%;height:100%;content:''}
.comment-content-true a:not(.light-link):not(.post_inser_a)::before,.wrapper-lg .entry-content a:not(.light-link):not(.post_inser_a)::before{background-color:#23b7e5;-webkit-transition:-webkit-transform .2s;transition:transform .2s;-webkit-transition-timing-function:cubic-bezier(.7,0,.3,1);transition-timing-function:cubic-bezier(.7,0,.3,1);-webkit-transform:rotateX(90deg);transform:rotateX(90deg);-webkit-transform-origin:50% 100%;transform-origin:50% 100%}
.comment-content-true a:not(.light-link):not(.post_inser_a):focus::before,.comment-content-true a:not(.light-link):not(.post_inser_a):hover::before,.wrapper-lg .entry-content a:not(.light-link):not(.post_inser_a):focus::before,.wrapper-lg .entry-content a:not(.light-link):not(.post_inser_a):hover::before{-webkit-transform:rotateX(0);transform:rotateX(0)}
.comment-content-true a:not(.light-link):not(.post_inser_a)::after,.wrapper-lg .entry-content a:not(.light-link):not(.post_inser_a)::after{border-bottom:1px solid #23b7e5}
如果使用版权提示插件,链接有可能会超出提示框,添加以下css解决:
.content-copyright {overflow: hidden}文章分页
修改文件 typecho/usr/themes/handsome/libs/Content.php
- 在文件最后一个}前添加如下两个私有函数
请注意:添加代码前删除掉如下代码中第4行splitword变量的值中page前后的两个间隔。
// 文章分页
    private static function parse($text)
    {
        $pagebar = '';
        $content = $text;
        $splitword = '= page =';
        if( strpos( $text , $splitword) !== false){
            $contents = explode($splitword , $text );
            $page = isset($_GET['page'])?intval($_GET['page']):1;
            $content = $contents[$page-1];
            $request = Typecho_Request::getInstance();
            $_GET['page'] = '{page}';
            $pagebar = self::setPageBar(count($contents),$page,$request->getPathinfo()."?".  http_build_query($_GET));
        }

        $text = $content.$pagebar;
        return $text;
    }

    private static function setPageBar($pageTotals,$page,$pageTemplate)
    {
        $isRewrite = Typecho_Widget::widget('Widget_Options')->rewrite;
        $siteUrl = Typecho_Widget::widget('Widget_Options')->rootUrl;
        $pageTemplate = ($isRewrite ? rtrim($siteUrl, '/') : $siteUrl."index.php") . $pageTemplate;
        $splitPage = 3;
        $pageHolder = array('{page}', '%7Bpage%7D');
        if ($pageTotals < 1) { return; }

        $pageBar .= '<nav class="text-center m-t-lg m-b-lg" role="navigation"><ol class="page-navigator">';

        if ($page > 1) {
            $pageBar .= '<li class="prev"><a href="' . str_replace($pageHolder, $page - 1, $pageTemplate) . '">' . '<i class="fontello fontello-chevron-left"></i></a></li>';
        }

        for ($i = 1; $i <= $pageTotals; $i ++) {
            if($page==$i){
                $pageBar .= '<li class="current"><a href="' . str_replace($pageHolder, $i, $pageTemplate) . '" ' . ($i != $page ? '' : '') . '>' . $i . '</a></li>';
            }else
            {if((($i==$page-3) and ($i!=1)) or (($i==$page+3) and ($i!=$pageTotals)))
                {
                    $pageBar .= '<li><span>...</span></li>';
                }else{
                    if((($i<$page-3) and ($i!=1)) or (($i>$page+3) and ($i!=$pageTotals)))
                    {}else{
                        $pageBar .= '<li><a href="' . str_replace($pageHolder, $i, $pageTemplate) . '" ' . ($i != $page ? '' : '') . '>' . $i . '</a></li>';
                    }
                }
            }
        }
        if ($page < $pageTotals) {
            $pageBar .= '<li class="next"><a href="' . str_replace($pageHolder, $page + 1, $pageTemplate) . '">' . '<i class="fontello fontello-chevron-right"></i></a></li>';
        }
        $pageBar .='</ol></nav><style>.page-navigator>li>a, .page-navigator>li>span{ background: #EFEFEF; line-height: 1.42857143; padding: 6px 12px; border-bottom-style:none !important; }</style>';

        return $pageBar;
}- 修改parseContentPublic函数的定义,添加一个参数$need2pagination并提供替换值
在文件 Content.php的1987行前后。
默认值 False,因此至少情况下不会调用内容分页函数避免对handsome原来的处理逻辑造成的影响,某些评论者在评论内容中插入分页符就比较比较尴尬了
public static function parseContentPublic($content,$need2pagination=False)- 在parseContentPublic函数中调用分页函数
在文件 Content.php的2092行前后,语句 return $content;之前增加一行代码,代码片段:
//文章分页
        if ($need2pagination==True) { $content=self::parse($content);}

        return $content;
}- 对于需要分页的内容,修改调用parseContentPublic函数,添加need2pagination参数
例如需要提供post的分页功能,仅需要修改如下函数 public static function postContent($obj, $status, $way = "origin"),搜索文本 该部分仅登录用户可见,在文件 Content.php的2092行前后:
// $content = Content::parseContentPublic($content); //该行修改前语句,下一行为修改后语句
            $content = Content::parseContentPublic($content,True);
        }
        return trim($content);
    }
目前只测过对帖子分页,页面等其他内容的分页没测试过。其他内容如果需要分页,同样可以用($content,True)参数试试,风险自担。
- 在文章中分页
文章需要分页处添加行 = page =(注意去掉页面前后的间隔)。当然也可以修改代码换成其他标识。
自定义后台路径
建议:
- 不要使用默认的 admin 后台地址,不仅仅是 Typecho,其他程序也是类似
- 不要使用默认的 admin 用户名
- 请使用强密码,即 字母、数字以及特殊字符的组合,且长度在 8 位以上
方法
修改后台登陆地址其实很简单,分成两步即可。
第一步
将Typecho程序根目录中的后台文件夹"admin"改名,名字即为你想自定义的地址名,例如:将"admin"改为"xxx"
第二步
修改根目录文件"config.inc.php",打开该文件后找到
/* 后台路径(相对路径) /
define('TYPECHO_ADMIN_DIR', '/admin/');
将代码中"admin"改为你自定义的地址,例如:xxx
然后
我们的Typecho程序网站的后台,就改成:xxx/xxx了
注意!
- 上面两次操作设置的名称应保持一致!
- 请不要在 robots.txt 文件中泄露你刚刚修改过后的文件地址。
写在最后
你甚至还可以调戏访问 admin 路径的访客:在网站目录下新建 admin 文件里,下面放一个
index.html ,这个 index.html 里你可以尽情的嘲讽或者调戏你的访客!
Typecho添加评论自动排第一功能栏目
1、将下面的代码复制粘贴到handsome主题的functions.php文件中。
function Autofirst(){
$db = Typecho_Db::get();
$query = $db->select()->from('table.comments')->where('authorId = ?','0')->order('coid',Typecho_Db::SORT_DESC)->limit(100);
$result = $db->fetchAll($query);
$arrUrl = array();
$arrAuthor = array();
foreach ($result as $value) {
    if($value["url"]!==null){
        array_push($arrUrl,$value["url"]);
        array_push($arrAuthor,$value["author"]);
    }
}
$su=array_filter(array_merge(array_unique($arrUrl)));
$sa=array_filter(array_merge(array_unique($arrAuthor)));
$num=0;
for($i=0;$i<count(array_unique($su));$i++){
    if($su[$i]!=="" && $num<8){
        $num+=1;
        $db1 = Typecho_Db::get();
        $query1 = $db1->select()->from('table.comments')->where('url = ?',$su[$i])->order('coid',Typecho_Db::SORT_DESC)->limit(100);
        $result1 = $db1->fetchAll($query1);
        $arrAuthor1 = array();
        foreach ($result1 as $value) {
                array_push($arrAuthor1,$value["author"]);
        }
        echo '<div class="col-lg-3 col-md-3 item"><a href="'.$su[$i].'" rel="external nofollow" class="btn btn-default btn-block overflow" target="_blank">'.$arrAuthor1[0].'</a></div>';
    }
  }
}
其中,functions里的“num<8”的8就是用来定义显示数量,推荐为4的倍数。
2、将下面CSS代码复制粘贴到Typecho后台“控制台>外观>设置外观>开发者设置>自定义CSS”中。
.autofirst1 .item{
    padding:5px 10px
  }
.overflow{
      overflow:hidden;
    white-space: nowrap;
    word-wrap: normal;
  }
.autofirst1{
    padding:10px 20px
  }
如果需要让按钮圆角显示,如果添加下面样式:
.item a{border-radius:10px}3、将下面HTML代码添加到handsome主题目录的index.php文件中。
<div class="row visible-lg visible-md">
<div class="col-lg-12">
<div class="panel panel-default ggg">
    <div class="panel-heading">
        <i class="glyphicon glyphicon-th"></i> 每评论一次就会自动排在本栏目第一位
    </div>
    <div class="panel-body row autofirst1">
        <?php Autofirst(100) ?>
    </div>
</div>
</div>
</div>
增加标签云独立页面
感觉在每个页面都把标签云显示出来会有点乱,但标签云的存在又有它自己的作用,于是想着将标签云单独在一个页面中罗列出来。
新建一个名为:tags.php文件,填入以下代码后存放在模板目录下:
<?php
    /**
    * 标签云
    *
    * @package custom
    */
?>
<?php if (!defined('__TYPECHO_ROOT_DIR__')) exit; ?>
<?php $this->need('component/header.php'); ?>

    <!-- aside -->
    <?php $this->need('component/aside.php'); ?>
    <!-- / aside -->

<!-- <div id="content" class="app-content"> -->
   <a class="off-screen-toggle hide"></a>
   <main class="app-content-body <?php echo Content::returnPageAnimateClass($this); ?>">
    <div class="hbox hbox-auto-xs hbox-auto-sm">
    <!--文章-->
     <div class="col center-part">
    <!--标题下的一排功能信息图标:作者/时间/浏览次数/评论数/分类-->
         <?php echo Content::exportPostPageHeader($this,$this->user->hasLogin(),true); ?>
      <div class="wrapper-md" id="post-panel">
       <?php Content::BreadcrumbNavigation($this, $this->options->rootUrl); ?>
       <!--博客文章样式 begin with .blog-post-->
       <div id="postpage" class="blog-post">
        <article class="single-post panel">
        <!--文章页面的头图-->
            <?php echo Content::exportHeaderImg($this); ?>

         <div class="wrapper-lg" id="post-content">
            <!--标签云 调用代码-->
            <div class="tt-tags">
            <?php Typecho_Widget::widget('Widget_Metas_Tag_Cloud','ignoreZeroCount=1&limit=280')->to($tags); ?><!--limit:输出标签数目,若设置为0代表输出全部-->
            <?php if($tags->have()): ?>
                <?php while ($tags->next()): ?>
<span class="tt-badge"  style="background-color:rgb(<?php echo(rand(0,255)); ?>,<?php echo(rand(0,255)); ?>,<?php echo(rand(0,255)); ?>)"><a  href="<?php $tags->permalink();?>" target="_blank"><?php $tags->name(); ?></a></span>
                <?php endwhile; ?>
            <?php endif; ?>
            </div>
             <!--文章页脚广告位-->
             <?php Content::pageFooter($this->options) ?>
         </div>
        </article>
       </div>
      </div>
     </div>
     <!--文章右侧边栏开始-->
    <?php $this->need('component/sidebar.php'); ?>
     <!--文章右侧边栏结束-->
    </div>
   </main>
<!--标签云的样式-->
<style>
.tt-tags{line-height: 2.3em;}
.tt-badge{padding: 5px 10px;margin-right: 5px;display: inline-block;font-size: 13px;font-weight: 700;line-height: 1;color: #fff;text-align: center;white-space: nowrap;vertical-align: middle;border-radius: 10px;}
.tt-badge:hover {background-color: #666!important;}
</style>
    <!-- footer -->
    <?php $this->need('component/footer.php'); ?>
      <!-- / footer -->
完成后,在后台创建独立页面,自定义模板选择刚刚新建的“标签云”模板,可以不用填入任何内容,直接发布便完成。
相关文章、随机文章的样式美化
修改代码:post.php 与 functions_mine.php:
post.php,看需求调用
<!--随机及相关文章-->
<div class="row">
<?php $this->related(3)->to($relatedPosts); ?>
<?php if ($relatedPosts->have()): ?>
<!-- 相关文章 -->
<div class="list-group col-lg-6">
      <span class="list-group-item tt-suiji-title">
        猜你想看
      </span>
    <?php while ($relatedPosts->next()): ?>
        <a class="list-group-item text-ellipsis" href="<?php $relatedPosts->permalink(); ?>" title="<?php $relatedPosts->title(); ?>"><?php $relatedPosts->title(); ?></a>
    <?php endwhile; ?>
</div>
<!--随机文章-->
<div class="list-group col-lg-6">
      <span class="list-group-item tt-suiji-title">
        随机文章
      </span>
      <?php getRandomPosts(3);?>
</div>
<?php else: ?>
<!--随机文章-->
<div class="list-group">
      <span class="list-group-item tt-suiji-title">
        随机文章
      </span>
      <?php getRandomPosts(3);?>
</div>
<?php endif; ?>
<!--随机及相关文章  End-->
functions_mine.php:文件末尾处
/**
     * 随机文章,在需要添加随机文章的地方加上代码:<?php getRandomPosts(10);?>
     * 数字10为要调用的文章数量。
     */
    function getRandomPosts($random)
    {
        $modified = $random->modified;
        $db = Typecho_Db::get();
        $adapterName = $db->getAdapterName();//兼容非MySQL数据库
        if ($adapterName == 'pgsql' || $adapterName == 'Pdo_Pgsql' || $adapterName == 'Pdo_SQLite' || $adapterName == 'SQLite') {
            $order_by = 'RANDOM()';
        } else {
            $order_by = 'RAND()';
        }
        $sql = $db->select()->from('table.contents')
            ->where('status = ?', 'publish')
            ->where('table.contents.created <= ?', time())
            ->where('type = ?', 'post')
            ->limit($random)
            ->order($order_by);

        $result = $db->fetchAll($sql);
        foreach ($result as $val) {
            $val = Typecho_Widget::widget('Widget_Abstract_Contents')->push($val);
            echo '<a class="list-group-item text-ellipsis" href="' . $val['permalink'] . '" title="' . $val['title'] . '"> ' . $val['title'] . ' </a>';
        }
    }
相关文章及随机文章列表的标题增加了自定义样式:tt-suiji-title 添加至后台自定义CSS
.tt-suiji-title{color: #777;background-color: #eee;}栏目列表美化《小图标模式下》 ::Fluent:91::

文件:
Content.php文件,位于:主题 / handsome / libs /,<div class="panel-small single-post box-shadow-wrap-normal">
<div class="index-post-img-small post-feature index-img-small">
<a href="{$parameterArray['linkUrl']}">
<div class="item-thumb-small lazy" {$backgroundImageHtml}></div>
</a>
</div>替换为:
<div class="panel-small single-post box-shadow-wrap-normal tt-small-blur">
    <div class="index-post-img-small post-feature index-img-small tt-left-box">
        <a href="{$parameterArray['linkUrl']}">
            <div class="item-thumb-small lazy tt-left-img" {$backgroundImageHtml}></div>
        </a>
    </div>
    <div class="tt-blur-img" {$backgroundImageHtml}></div>
设置外观→开发者设置→自定义CSS,填入以下css样式:
.tt-small-blur{position:relative;z-index:1;display:flex;overflow:hidden;background-color:#8abcd1;color:#fff;}
.tt-small-blur .tt-left-box{z-index:1;-webkit-clip-path:polygon(0 0,94% 0,100% 100%,0 100%);clip-path:polygon(0 0,94% 0,100% 100%,0 100%);}
.tt-small-blur .tt-left-img{width:100%;height:100%;-o-object-fit:cover;object-fit:cover;}
.tt-small-blur .tt-blur-img{position:absolute;top:0;right:0;bottom:0;left:0;z-index:0;width:100%;height:100%;background-position:center;background-size:cover;transform:scale(1.4);-o-object-fit:cover;object-fit:cover;-webkit-filter:blur(1.275rem) brightness(.83);filter:blur(1.275rem) brightness(.83);}
.tt-small-blur .post-meta{z-index:1;display:flex;color:inherit;flex-direction:column;justify-content:space-between;}
.tt-small-blur .text-title{color:inherit;}
.tt-small-blur .post-meta h2,.tt-small-blur .post-meta p{text-shadow:.1875rem .1875rem .3125rem #333;letter-spacing:.09rem;}
.tt-small-blur .text-muted{color:inherit;}
.tt-small-blur .post-meta {padding: 30px 30px 15px 30px;}
@media (max-width:500px){.tt-small-blur .index-post-title{display:-webkit-box;display:-moz-box;overflow:hidden;margin-bottom:2px;height:48px;text-overflow:ellipsis;white-space:normal;word-wrap:break-word;line-height:1.4;-webkit-line-clamp:2;-webkit-box-orient:vertical;-moz-line-clamp:2;-moz-box-orient:vertical;word-break:break-all;}}
@media (max-width:500px){.tt-small-blur .summary{display:none;}}
@media (max-width:380px){.tt-small-blur .post-meta{padding:10px 15px;}}
@media (min-width:768px) and (max-width: 1199px){.tt-small-blur .summary {height: 55px;}.tt-small-blur .line-lg {margin-top: 1px;margin-bottom: 1px;}}
踩坑点
主题外观设置>主题增强功能>增强功能开关>延迟加载图片(lazyload)开启后在显卡较差设备可能会带来滚动掉帧
延迟加载图片(lazyload)开启后在显卡较差设备可能会带来滚动掉帧
此项一定要关闭,不然显示下面状态!

全站字数-在线人数-访客总数-网站加载耗时
以下代码添加至/usr/themes/handsome/functions.php内第一行php后
/**自定义
     * 访问总量
     */
     function theAllViews(){
             $db = Typecho_Db::get();
             $row = $db->fetchAll('SELECT SUM(VIEWS) FROM `typecho_contents`');
                 echo number_format($row[0]['SUM(VIEWS)']);
     }

    /**
     * 响应时间
     */
    function timer_start() {
        global $timestart;
        $mtime = explode( ' ', microtime()  );
        $timestart = $mtime[1] + $mtime[0];
        return true;
    }
    timer_start();
    function timer_stop( $display = 0, $precision = 3  ) {
        global $timestart, $timeend;
        $mtime = explode( ' ', microtime()  );
        $timeend = $mtime[1] + $mtime[0];
        $timetotal = number_format( $timeend - $timestart, $precision  );
        $r = $timetotal < 1 ? $timetotal * 1000 . " ms" : $timetotal . " s";
        if ( $display  ) {
            echo $r;
        }
        return $r;
    }
    /**
     * 获取访客IP并保存
     */
    $ip = $_SERVER['REMOTE_ADDR'];
    $time = gmdate("H:i:s",time()+8*3600);
    $file = "ip.txt" ;
    $fp=fopen ("ip.txt","a") ;
    $txt= "$ip"."----"."$time"."\n";
    fputs($fp,$txt);
    /**
     * 在线人数
     */
    function online_users() {
        $filename='online.txt'; //数据文件
        $cookiename='Nanlon_OnLineCount'; //Cookie名称
        $onlinetime=30; //在线有效时间
        $online=file($filename);
        $nowtime=$_SERVER['REQUEST_TIME'];
        $nowonline=array();
        foreach($online as $line){
            $row=explode('|',$line);
            $sesstime=trim($row[1]);
            if(($nowtime - $sesstime)<=$onlinetime){
                $nowonline[$row[0]]=$sesstime;
            }
        }
        if(isset($_COOKIE[$cookiename])){
            $uid=$_COOKIE[$cookiename];
        }else{
            $vid=0;
            do{
                $vid++;
                $uid='U'.$vid;
            }while(array_key_exists($uid,$nowonline));
            setcookie($cookiename,$uid);
        }
        $nowonline[$uid]=$nowtime;
        $total_online=count($nowonline);
        if($fp=@fopen($filename,'w')){
            if(flock($fp,LOCK_EX)){
                rewind($fp);
                foreach($nowonline as $fuid=>$ftime){
                    $fline=$fuid.'|'.$ftime."\n";
                    @fputs($fp,$fline);
                }
                flock($fp,LOCK_UN);
                fclose($fp);
            }
        }
        echo "$total_online";
    }

// 自定义END以下代码添加至/usr/themes/handsome/component/sidebar.php内
<li class="list-group-item text-second"><span class="blog-info-icons"><i data-feather="edit-3"></i></span><span class="badge pull-right"><?php echo allOfCharacters(); ?></span><?php _me("全站字数") ?></li>
<li class="list-group-item"> <i class="glyphicon glyphicon-user text-muted text-muted"></i> <span class="badge pull-right"><?php echo online_users() ?></span><?php _me("在线人数") ?></li>
<li class="list-group-item text-second"><span class="blog-info-icons"> <i data-feather="user"></i></span><span class="badge pull-right"><?php echo theAllViews();?></span><?php _me("访客总数") ?></li>
<li class="list-group-item text-second"><span class="blog-info-icons"> <i data-feather="clock"></i></span> <span class="badge pull-right"><?php echo timer_stop();?></span><?php _me("加载耗时") ?></li>
加载动画
以下代码添加至/usr/themes/handsome/header.php内 最后
<!--加载动画-->
    <style>
    #PageLoading{background-color:#fff;height:100%;width:100%;position:fixed;z-index:1;margin-top:0px;top:0px;}
    #PageLoading-center{width:100%;height:100%;position:relative;}
    #PageLoading-center-absolute{
        position:absolute;left:50%;top:50%;
        height:200px;width:200px;
        margin-top:-100px;
        margin-left:-100px;
    }
    .object2{
        -moz-border-radius:50% 50% 50% 50%;
        -webkit-border-radius:50% 50% 50% 50%;
        border-radius:50% 50% 50% 50%;
        position:absolute;
        border-left:5px solid #FFB6C1;
        border-right:5px solid #b6def7;
        border-top:5px solid transparent;
        border-bottom:5px solid transparent;
        -webkit-animation:animate 2s infinite;
        animation:animate 2s infinite;

    }
    #object_one{left:75px;top:75px;width:50px;height:50px;}
    #object_two{left:65px;top:65px;width:70px;height:70px;-webkit-animation-delay:0.1s;animation-delay:0.1s;}
    #object_three{left:55px;top:55px;width:90px;height:90px;-webkit-animation-delay:0.2s;animation-delay:0.2s;}
    #object_four{left:45px;top:45px;width:110px;height:110px;-webkit-animation-delay:0.3s;animation-delay:0.3s;}
    @-webkit-keyframes animate{50%{-ms-transform:rotate(180deg);-webkit-transform:rotate(180deg);transform:rotate(180deg);}
    100%{-ms-transform:rotate(0deg);-webkit-transform:rotate(0deg);transform:rotate(0deg);}}
    @keyframes animate{50%{-ms-transform:rotate(180deg);-webkit-transform:rotate(180deg);transform:rotate(180deg);}
    100%{-ms-transform:rotate(0deg);-webkit-transform:rotate(0deg);transform:rotate(0deg);}}
    </style>

  <!--加载动画-->
<body id="body" class="fix-padding skt-loading">
    <body id="body" class="fix-padding" style="overflow:hidden">
        <div id="PageLoading" style="z-index:99999999;">
            <div id="PageLoading-center">
                <div id="PageLoading-center-absolute">
                    <div class="object2" id="object_four"></div>
                    <div class="object2" id="object_three"></div>
                    <div class="object2" id="object_two"></div>
                    <div class="object2" id="object_one"></div>
                </div>
            </div>
        </div>
    </body>
</body>
主题设置,自定义 JavaScript,添加以下代码
$(function(){
        $("#PageLoading").fadeOut(400);
        $("#body").css('overflow','');
    });
修改评论区名称前图标

路径:/usr/themes/handsome/component/comments.php
1.1 找到下面的这串代码(位置大概在169行)
<img class="author-avatar" src="<?php echo Utils::getAvator($this->remember('mail',true),65) ?>" nogallery/>1.2替换成下面代码
<img class="author-avatar" src="https://sdn.geekzu.org/avatar/d41d8cd98f00b204e9800998ecf8427e?s=65&r=G&d=https://cdn.jsdelivr.net/gh/52Lxcloud/images/461841414305e1ced7b8d7311f76e733.gif" nogallery=""> 1.3效果
1.3效果
删除首页文章卡片的作者信息(图片板式)
版本: 9.2.1
文件路径:/handsome/libs/Content.php
删除源代码
766-767行<li><span class="m-r-sm right-small-icons"><i data-feather="user"></i></span><a href="{$parameterArray['authorUrl']}">{$parameterArray['author']}</a></li>
<li><span class="right-small-icons m-r-sm"><i data-feather="clock"></i></span>{$dateString}</li>770-771行
<li><span class="right-small-icons m-r-sm"><i
data-feather="message-square"></i></span><a href="{$parameterArray['linkUrl']}#comments">{$commentNumString}</a></li>
Handsome文件
component/aside.php        左边导航栏
    component/comments.php     评论区
    component/footer.php       底部版权、音乐播放器之类
    component/header.php       页面头,没啥要改的
    component/headnav.php      顶部导航
    component/say.php          时光机动态
    component/sidebar.php      右侧栏目
    component/third_party_comments.php    3.3.0新增,第三方评论
    css/        博客CSS,一般不要改
    fonts/      博客字体,一般不要改
    img/        图像,一般不要改
    js/         js文件,一般不要改
    lang/       语言文件
    libs/Content.php    文章内容
    libs/...    一般不要改
    usr/        另一个语言文件?
    404.php     404界面
    archive.php    整合
    booklist.php   书单
    cross.php      时光机
    files.php      归档
    functions.php  配置界面的东西
    guestbook.php  留言板
    index.php      首页
    links.php      友链
    page.php       文章页面整合
    post.php       文章输出

    color: 选填,不填默认为success(绿色),可选值:
    light:白色
    info:蓝色
    dark:深色
    success:绿色
    black:黑色
    warning:黄色
    primary:紫色
    danger:红色
13 条评论
[...]}其他主题方法大致相同 把这代码输出在之前就ok部分内容转载自以下网站Kano酱 :https://kanochan.net/archives/1003.html听闻: https://sangxuesheng.com/archives/634.htmlsword:https://sword.studio/30.html[...]
[...]@media (max-width: 900px){.deng-box2{display:none;}}若您需要修改灯笼的位置,可在css代码中找到.deng-box1,调整left的px值,找到.deng-box2,调整right的px值最后,去您的主页刷新下页面,灯笼就出来了还有更多,在这查找[...]
大佬 右侧悬浮的外观设置 怎么搞 感谢 ::WBB:17::
点击https://www.ihewro.com/usr/themes/handsome/assets/css/handsome_8_4_2.min.css 地址,保存文件后并重命名为handsome.min.css 最后上传服务器替换一下主题目录下的usr/themes/handsome/assets/css/ 该文件即可(注意刷新浏览器缓存或者CDN缓存)。替换该文件相比较正式发布8.4版本只恢复布局相关css,其它仍然是最新版本样式。
博主,你的网盘怎么搞的啊,可以分享一下吗
使用的是alist程序,仓库地址:https://github.com/alist-org/alist
文档地址:https://alist-doc.nn.ci/docs/intro/
博主你好,请问有没有办法,把windows下handsome 默认的代码框(方方正正的太丑了)改成 mac的代码框
我现在使用的代码风格就是mac的 ::wechat:54::
handsome主题是有的,外观设置》深色模式下的代码高亮风格选择》mac_dark
外观设置》浅色模式下的代码高亮风格选择》mac_light
非常感谢,问题已经解决了谢谢
::WBB:10::
嘿咻嘿咻 ::WBB:5::